Composition Notebook Planner
- Tammy
- Mar 4
- 6 min read
Another Composition Notebook Redesign DIY!
"From Basic to Beautiful! How to Turn a Composition Notebook into the Dreamiest Planner and or Junk Journal Planner" ✨📓💕

💖 Turn a Simple Composition Notebook into the Cutest Junk Journal Planner Ever 📓✨
Okay my smart cookies… if you’ve got a plain black-and-white composition notebook sitting around, you’re about to turn it into something magical. I'm talking layered papers, vintage vibes, cozy planner spreads, and chunky junk journal goodness. 🥹🗂️
This is part junk journal, part planner, part creative therapy session... and I promise, it’s way easier (and more fun!) than it looks.
Let’s make something beautiful. 🎨💕
Who says DIY Planners can’t be super stylish? ✨
Plus, they’re an awesome budget-friendly alternative when those fancy designer notebooks feel a little too pricey. Again, I’m spilling all the secrets on how to totally transform another plain old composition notebook into something uniquely YOU!... using supplies you probably already have lying around! 🎨📓
I’ve been working on this and a few other planners for the last couple of months and I’m super excited to finally share it with you! One of my favorite moments in my journaling/planning routine is cracking open a brand new notebook... it’s like a fresh adventure waiting to happen. I love the smooth crisp pages, the smell (I know call me weird) and just the all around feel; now, I keep a stash of high-quality notebooks on hand so I’m always ready to start a new project whenever inspiration strikes. But if you’re just dipping your toes into journaling or planner life (or, hey, “planner-ing”... yes, I just made that a word! 😜💜), or if you’re watching your wallet, those designer notebooks can be intimidating. They often run $10-$20 each, while you can grab composition notebooks for just $.50 cents to $2. Score, right? 🙌
I’m going to show you how to turn a plain, boring composition notebook into a chic DIY planner you’ll love using for planning, bullet journaling, junk journaling (yeah check out that post too!) studying, doodling, daily journaling, scrapbooking, creative writing... you name it!
I seriously adore those classic black marble composition notebooks. You can find them almost anywhere, NOW even in half size! (stop by that post as well to grab some ideas) and they’re the perfect blank canvas for your DIY journaly-plannering magic. Customize the cover, add an index, toss in some pockets... the possibilities are endless! Plus, they’re lightweight, budget-friendly, perfectly sized for comfy writing, and the paper develops that charming crinkly texture the more you use it.
There’s just something about these notebooks that totally wins my heart every time. Ahhh, stationery love! 🙃💜
Composition Notebook Planner
Another Composition Notebook Redesign!
Materials:
Here’s what I used to create my DIY planner... but trust me, these aren’t the only options! Start with whatever you’ve got on hand, then mix and match with new colors and materials to make it your own.
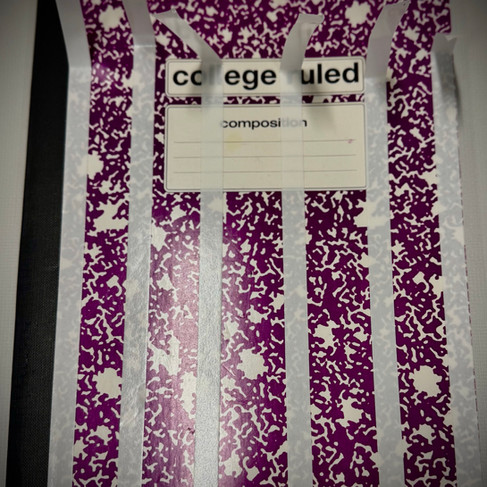
A composition notebook
Glue stick or liquid glue
Double sided tape
Scrapbook paper, wrapping paper, or old book pages
Stickers, washi tape, envelopes, tags
Scissors
Pliers
Ribbon or fabric scraps
Markers or pens
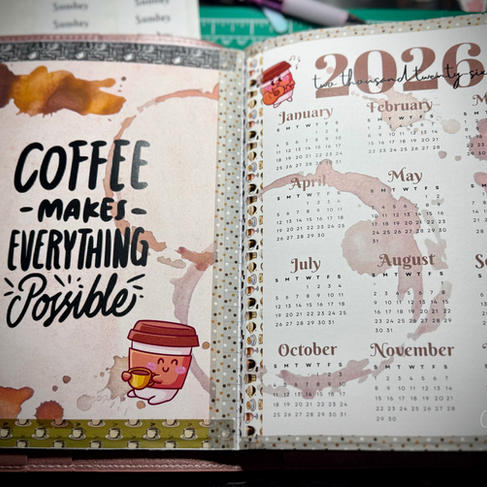
Yearly outlook calendar printed on cardstock
Pre-made and or purchased themed stickers
Metal corner protector crimps
Optional:
Mod Podge, paper clips, stamps, lace
💡 CWT Tip: This is the perfect time to raid your junk drawer. For “Junk” journals they LOVE random bits and pieces.
Ready to get crafty yet? Let’s do this!
Directions:
Step 1: Strengthen Your Pages (Glue Two Together!)
Composition notebooks are cute… but those pages can be thin and flimsy.
To make your journal sturdier:
Open to the first spread.
Spread glue across one full page (don’t forget the edges!).
Press the next page directly on top of it.
Smooth it out to starting from the seam to the open ends, removing air and air bubbles that can occur.
Let it dry under a heavy book.
Boom. 💥 You just made a thicker, stronger page that can handle paint, glue, layers, and chunky embellishments.
Repeat this throughout the notebook... specially on pages where you plan to collage heavily or add pockets.
This also:
Reduces bleed-through
Makes your journal feel substantial
Gives it that delicious chunky junk journal vibe
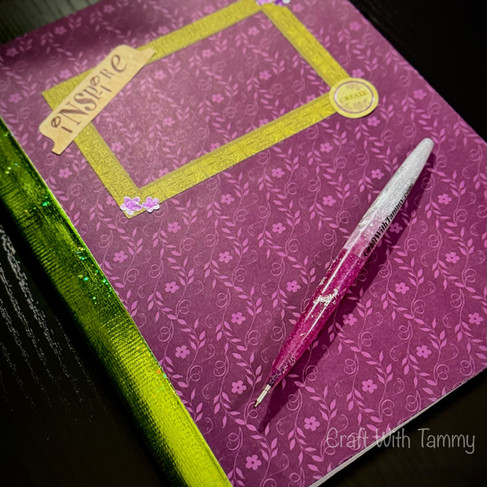
Step 2: Cover Glow-Up Time!
Let’s give that cover a makeover.
You can:
Glue scrapbook paper over the front and back
Wrap it in fabric for a cozy feel
Collage magazine clippings
Add lace trim along the edges
Paint it with acrylic for a bold look
Seal it with Mod Podge if you want durability (and shine!).
Add a title like:
“Cozy Chaos”
“Everyday Magic”
“Life & Lists”
“Bits & Pieces”
Or just your name in cute lettering.
Step 3: Create Pockets & Tuck Spots
This is where junk journals get FUN.
Glue in:
An envelope (cut the flap open for storage)
A folded piece of scrapbook paper (glue 3 sides to make a pocket)
A small paper bag
A torn book page folded at the bottom
These are perfect for:
Ticket stubs
Receipts
Affirmation cards
Sticky notes
Weekly plans
Layer washi tape or lace along the edges for extra sweetness and reinforcement.
Step 4: Mix Planner Pages with Creative Pages
This is YOUR hybrid creation. Make it work for your life.
Here are some ideas:
🌼 Daily Planner Pages
Top 3 priorities
Weekly, Monthly or Daily Calendars
To-do list
Notes section
Gratitude line
🌙 Weekly Spread
Divide a 2-page spread into 7 sections. Add stickers, and doodles. Make it cozy.
🌈 Creative Junk Pages
Collage pages with random scraps
Quotes you love
Mood boards
Memory pages
The magic is in mixing structure with creativity.
Step 5: Add Texture & Layers
This is the secret sauce.
Layer:
Book paper
Scrap paper
Fabric
Washi tape
Stamps
Tags tied with ribbon
Don’t aim for perfection... aim for cozy chaos.
Slight wrinkles? Adorable.Uneven edges? Character. Chunky spine? YES PLEASE.
Step 6: Add Interactive Elements
Want it extra special?
Try:
Paper clips with charms or ribbon
Fold-out pages
Flip-up tabs
Tip-ins (tape one edge so it flips open)
Hidden journaling spots
You’re basically building a tiny paper treasure chest.
Step 7: Personal Touches Make It Magical
Add:
Your favorite quotes
Photos
Dried flowers (press them first!)
Coffee-stained paper
Affirmations
Little love notes to yourself
This journal is a reflection of your life... messy, layered, meaningful.
🥰 And Voila! 💜
Turning a simple composition notebook into a junk journal planner is creative self-care in disguise.
You’re not just decorating paper. You’re building:
A planning system
A memory keeper
A creativity outlet
A little book of YOU
And remember ... gluing pages together is your best friend when you want durability and that thick, luscious journal feel. 📓
Now grab your glue stick and let the chaos begin.
If you’d like, I can also give you themed junk journal ideas ( Gamercore, Coffee lover, cottagecore, normcore, dark academia, vintage botanical, etc.)
You’ve got yourself a gorgeous DIY planner, ready to fill with all your brilliant ideas and daily tasks. These are perfect for bullet journaling, planning, junk journaling, travel notes, doodling... you name it! They also make thoughtful gifts for teachers, writers, teens, or that aspiring entrepreneur in your life. Don’t forget to check back soon for the matching pen and paperclip tutorial to complete your set. Perfect for holidays, birthdays, or just because!
This website is the project of an unpaid hobby, fully maintained and supported by CWT. There are NO paid affiliations, professional photographers, nutritionists or paid product reviews associated. CWT is not a certified artist, dietician or nutritionist. Any nutritional information shared on this site is an estimate counted through measurements and package nutritional information used in each recipe at that given time. If calorie, macro counting and other nutritional values are important to you and your health, CWT recommends running the ingredients through your choice of nutritional calculator you prefer. Calories can and will vary depending on national brands used per recipe. Anything created by using CWT's recipes, or tutorials is fully the readers responsibility. CWT is not responsible or will be held liable for the outcome of the readers completed project or recipe(s).
"Oh my goodness, I LOVED this post!! I’ve been wanting to try making a junk journal but felt so overwhelmed and you made it feel so fun and doable. The tip about gluing two pages together for extra stability is GENIUS 👏✨ I never would have thought of that, and it makes so much sense for adding chunky layers! Your tone is so warm and encouraging, it honestly feels like crafting with a friend. I’m officially inspired to pull out my old composition notebooks and start creating tonight. Thank you for breaking everything down in such a sweet, simple way I can’t wait to try making pockets and tuck spots! 💕"