Follow Me:
418 results found with an empty search
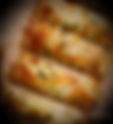
- Chinese Dumplings w/Sauce
AKA Potstickers " One of your favorite take out foods, Chinese Dumplings (also commonly known as potstickers), are easy to make and taste much better when you make them homemade! " Chinese Dumplings w/ Sauce AKA Potstickers Servings: 36 - 2 dumplings Prep Time: 35 Minutes Cook Time: 15 minutes Ingredients: Filling: 1 pound lean ground pork or ground chicken 4 large cabbage leaves or pre shredded , minced 6 stalks green onions , minced 7 shiitake mushrooms , minced (if dried – rehydrated and rinsed carefully) 1/2 cup bamboo shoots , minced 2 garlic cloves , minced 3 tablespoons minced fresh ginger 3 tablespoons soy sauce 2 tablespoons corn starch 1 tablespoon sesame oil 2 teaspoons sriracha , optional if you like spicy Dumplings: 36 won ton wrappers 2 tablespoons vegetable oil water , as needed soy sauce , for serving green onions , optional garnish Potsticker Sauce: 4 tablespoons low sodium soy sauce 1 1/2 tablespoons rice vinegar 1 1/2 tablespoons rice wine 1 teaspoon chili oil or chili sauce/paste , to taste (optional) Instructions: Potsticker Sauce : Whisk together all ingredients and serve in a shallow bowl to dip your potstickers in! You can make this ahead and store it in the fridge for up to a week. Filling: In a large bowl, combine all filling ingredients until well combined. Assemble Dumplings: You will need a clean workspace, wonton wrappers, prepared pork filling, a small bowl of water, and chopsticks. Begin by filling the wonton wrapper with about a tablespoons worth of pork filling. Wet your finger, and run along the edges of the wonton wrapper. This will help to seal it closed. Fold the wrapper over the filling to create a half-moon shape, pinching the edges and over lapping each pinch over the next to seal. Once you have filled the dumplings you can freeze them or eat them fresh. Freeze Dumplings: Place the dumplings in a single layer on a cookie sheet and freeze for about 30 minutes. Then place in a ziplock baggie, where they can be frozen for up to 3 months. Pan Fry (Pot Stickers): Heat a large skillet over medium high heat. Add 2 tablespoons of vegetable oil or sesame oil to the skillet and place dumplings in an even layer. Fry for a few minutes until bottoms are golden. Add 1/3 cup of water and cover with a tight fitting lid. Cook until the water has boiled away and then uncover and reduce heat to medium or medium low. Let the dumplings cook for another 2 minutes then remove from heat and serve with pot sticker sauce and thinly sliced green onions. Steamed Dumplings: Place dumplings in a steamer basket on a single layer of cabbage leaves or a piece of parchment paper and steam for about 8 minutes. These dumplings pairs great with my Chinese Sticky Chicken Wings and Chow Mein ! Nutrition: Calories: 56 | Carbohydrates: 6g | Protein: 4g | Fat: 2g | Polyunsaturated Fat: 1g | Cholesterol: 8mg | Sodium: 162mg "WOW!!!! Absolutely delicious! Made this and my husband and I are so in love with this dumpling recipe!" CWT is not a certified dietician or nutritionist. Any nutritional information shared on this site is an estimate counted through measurements and package nutritional information used in each recipe. If calorie, macro counting and other nutritional values are important to you, I recommend running the ingredients through your choice of nutritional calculator you prefer. Calories can vary depending on national brands used per recipe.
- Charmies
" These Charmies are uniquely designed and handcrafted with flawless Swarovski crystals and TierraCast high quality silver charms that measures approximately 3 1/2” in length, and finished with fancy silver metal beads to accent the colors. It is carefully wire wrapped with attention to detail and made with love! ♥ The Swarovski Charmie decoration measures approximately 3 1/2” before the chain is added and comes on your choice of the following hanging options: 1) Rearview Mirror / Purse Charm – a silver chain with clasp 2) Home Decor / Key Chain – a 6″ chain with a ring. Materials: Flat or decorated head pins Looped head pins 1 Large stone or charm Metal gage wire 22 or 24 gage Metal key ring or large lobster style clasp Looped chain of choice, in length you prefer Needle nose, flat nose and round pliers Assorted beads of choice in color and size Assorted ending metal charms of choice Directions: STEP 1: Choose your beads and plan your color scheme Begin by gathering bright colored beads. Examples to choose from are things like bird shaped beads, evil eyes, heart shaped, stars, moons - just things that are fun and cheerful. We are going to layer these beads to create the charms, so keep that in mind as you plan and choose your beads. I also like to add some rhinestone rondelles to add a little bit of glitter to what I'm doing and kind of tie it all together. Designing these charms is so fun and creative. Because you are making several charms to be used on one project, it is fun to mix and match the beads to create a variety look. As I mentioned before, I like to use unique charms so there is a lot of different things to look at. These charms would also be really beautiful in a monochromatic or all metallic color scheme for an unexpected pop of interest in a neutral accessory. STEP 2: Tack beads onto a headpin to create individual charms Begin by stacking beads on a headpin in order that you want them. ( Example: maybe a green bead and a rhinestone rondelle, an evil eye, another rondelle and a heart. STEP 3: Secure beads to head pin by twisting Use round nose pliers and hold the charm just slightly above the top of that bead with a little bit of breathing room in there. Take this top piece and wrap the pin away from you and back towards yourself coming up under the pliers, really creating a nice ninety degree angle and then beginning to twist that head pin around itself, really watching where that coil is formed, similar to how an earring head pin is tied off. Twist two to three times, maybe even four. And then taking it off of your round nose pliers and simply snipping off my excess wire from the head pin. STEP 4: Attach jump ring to turn it into a charm In order to make this into a happy charm, use a heavy duty jump ring. So this is going to give that flexibility to add it on different sections of the Charmie you are designing, whether it's a chain or a lobster claw or even a hoop earring. So you will use two pairs of flat nose or chain nose pliers to gently rotate that jump ring open and slip on a charm and then just gently close it. Make sure both of those ends of the jump ring are nice and flush. And there's your first one! Finish tying off the rest of your charms. STEP 5: Add charms to design your hanging charm project There are so many different ways to set up your Charmie. Go with what looks best to you, adding one charm to the chain at a time; in different areas, sides, and levels of the chain until you have used all your charms. Have fun with your project, make it a party and invite some friends over. Grab the kids and make gifts for family and friends. You can have so much fun switching these charms out and trying different combinations of colors, sizes and combos. There possibilities are endless!
- Easy Cinnamon Rolls
"These easy cinnamon rolls are perfect for yeast beginners because they only require 1 rise. Each cinnamon roll is extra soft with the most delicious cinnamon swirl!" Easy Cinnamon Rolls Servings – 10-12 Prep Time – 1 Hour and 40 Minutes Cook Time – 25 Minutes Ingredients: Dough 2 and 3/4 cups all-purpose flour 1/4 cup granulated sugar 1/2 teaspoon salt 3/4 cup whole milk 3 Tablespoons unsalted butter 2 and 1/4 teaspoons any instant yeast (1standard packet) 1 large egg, at room temperature Filling 3 Tablespoons unsalted butter, extra softened 1/3 cup packed light or dark brown sugar 1 Tablespoon ground cinnamon Cream Cheese Icing 4 ounces full-fat block cream cheese, softened to room temperature 2 Tablespoons unsalted butter, softened to room temperature 2/3 cup confectioners’ sugar 1 teaspoon pure vanilla extract Directions: Whisk the flour, sugar, and salt together in a large bowl. Set aside. Combine the milk and butter together in a heatproof bowl. Microwave or use the stove and heat until the butter has melted and the mixture is warm to the touch (about 110°F no higher). Whisk in the yeast until it has dissolved. Pour mixture into the dry ingredients, add the egg, and stir with a sturdy rubber spatula or wooden spoon OR use a stand mixer with a paddle attachment on medium speed. Mix until a soft dough forms. Transfer dough to a lightly floured surface. Using floured hands, knead the dough for 3-5 minutes. You should have a smooth ball of dough. If the dough is super soft or sticky, you can add a little more flour. Place in a lightly greased bowl (I use non-stick spray), cover loosely, and let the dough rest for about 10 minutes as you get the filling ingredients ready. After 10 minutes, roll the dough out in a 14×8-inch rectangle. Spread the softened butter on top. Mix together the cinnamon and brown sugar. Sprinkle it all over the dough. Roll up the dough to make a 14-inch log. Cut into 10–12 even rolls and arrange in a lightly greased 9- or 10-inch round cake pan, pie dish, or square baking pan. Cover the pan with aluminum foil, plastic wrap, or a clean kitchen towel. Allow the rolls to rise in a relatively warm environment for 60–90 minutes or until double in size. After the rolls have doubled in size, preheat the oven to 375°F. Bake for 24–27 minutes, or until lightly browned. If you notice the tops are getting too brown too quickly, loosely tent the pan with aluminum foil and continue baking. If you want to be precise about their doneness, their internal temperature taken with an instant read thermometer should be around 195–200°F when done. Remove pan from the oven and place pan on a wire rack as you make the icing. (You can also make the icing as the rolls bake.) Icing In a medium bowl using a handheld or stand mixer fitted with a paddle or whisk attachment, beat the cream cheese on high speed until smooth and creamy. Add the butter and beat until smooth and combined, then beat in the confectioners’ sugar and vanilla until combined. Using a knife or icing spatula, spread the icing over the warm rolls and serve immediately. Cover leftover frosted or unfrosted rolls tightly and store at room temperature for up to 2 days or in the refrigerator for up to 5 days. Notes: Coffee Icing: Whisk 1 cup confectioners’ sugar, 1/2 teaspoon pure vanilla extract, and 2–3 Tablespoons strong brewed coffee together until smooth. Drizzle over warm rolls. Vanilla Icing: Whisk 1 cup confectioners’ sugar, 1/2 teaspoon pure vanilla extract, 2-3 Tablespoons milk together until smooth. Drizzle over warm rolls. Make Ahead Instructions: This dough can be made the night before through step 4. Cover with plastic wrap and let rest in the refrigerator overnight. The next morning, remove from the refrigerator and allow to rise in a warm environment, about 1 hour. Bake as recipe calls above. Freezing Instructions: Baked rolls can be frozen up to 2–3 months. Thaw overnight in the refrigerator and warm up before enjoying. You can also freeze the unbaked rolls and here’s how: bake the rolls as follows above for only about 10 minutes at 375°F. Cool completely, then cover tightly and freeze. To serve, take the pan of rolls out of the freezer and put into the refrigerator a few hours before serving. Then, finish baking them for the remaining 15–18 minutes. "I love this recipe so much! I’ve been craving cinnamon rolls but somehow the store bought ones were always dry and disappointing. These were lovely. I’ve never had any success in baking breads, so I was certain it would fail, but they turned out delightful. Thank you for sharing!" CWT is not a certified dietician or nutritionist. Any nutritional information shared on this site is an estimate counted through measurements and package nutritional information used in each recipe. If calorie, macro counting and other nutritional values are important to you, I recommend running the ingredients through your choice of nutritional calculator you prefer. Calories can vary depending on national brands used per recipe.
- Easy Creme Brûlée
" This creme brûlée is a simple but elegant dessert that will impress all of your guests! You just can’t beat a creamy custard topped with caramelized sugar and delicious fresh fruit! " Easy Creme Brûlée Servings – 4 Prep Time – 10 Minutes Cook Time – 30 Minutes The thought of making creme brûlée can be intimidating if you’ve never made it! But trust me, it’s easier than you think! It is made with just a few ingredients and very little prep time! One of the best things about creme brûlée is that you can make it a few hours or even a few days in advance! You just have to finish off the topping just before you’re ready to serve. This recipe tastes just as good (if not better!) as all of the ones that I have tried at fancy restaurants! This creme brûlée makes the perfect dessert for serving to guests — they’ll be wowed by its presentation! But the reality is that you didn’t have to spend a lot of hands-on time preparing it. Ingredients: 2 cups heavy cream 4 egg yolks 1/3 cup granulated sugar (1/4 if you prefer less sweet) 1 teaspoon vanilla 1/4 cup granulated sugar for topping Fresh fruit of choice for garnish, optional Directions: In a small pot, heat cream over medium heat until hot but not boiling — small bubbles will appear just along the edge of the pot. Meanwhile, whisk together egg yolks, 1/3 cup sugar, and vanilla — I like to do this in a large glass measuring cup for easy pouring! When the cream is hot, add it to the egg yolk mixture a little at a time, whisking well after each addition. Pour into 4, 7-8 ounce ramekins, (wider and shallower is better if you have them). Place filled ramekins in a large baking dish and fill the baking dish with hot water so that it comes 3/4 of the way up the sides of the ramekins. Be careful not to get any water in the custard! Bake at 325 degrees F for 30-45 minutes. This will depend on how deep the custard is! (Smaller ramekins, deeper custard = longer bake time) The top will appear set but underneath it will still jiggle. Cool to room temperature and then refrigerate for at least 2 hours until chilled. (You can wrap and refrigerate up to 3 days). Sprinkle each custard with 1 tablespoon granulated sugar and torch or broil just until caramelized. Serve immediately or chill to serve later. Garnish with fresh fruit if you wish! Nutrition: Calories: 584 | Carbohydrates 33g | Protein 5g | Fat 49g | Saturated Fat 29g | Cholesterol 358mg | Sodium 54mg | Potassium 109mg | Sugar 29g | Vitamin C 1mg | Calcium 101mg | Iron 1mg "This recipe is the BEST. I have used it several times and it has never failed me! This recipe is crowd-pleaser. With so few ingredients it can be made pretty cheap. I definitely recommend this life changing recipe!" CWT is not a certified dietician or nutritionist. Any nutritional information shared on this site is an estimate counted through measurements and package nutritional information used in each recipe. If calorie, macro counting and other nutritional values are important to you, I recommend running the ingredients through your choice of nutritional calculator you prefer. Calories can vary depending on national brands used per recipe.
- Orange Iced Tea
Copycat Recipe "Orange Iced Tea is a refreshing summer iced tea recipe packed with the flavor of fresh oranges. Make a large batch of this orange iced tea for the hot summer afternoons because it will get over fast. Serve it up in a mason jar for a souther style." Orange Iced Tea Servings – 8 Prep Time – 10 Minutes Chill Time – 2 Hours or overnight is best Ingredients: 2 oranges 4 cups boiling water 4 cups cold water 5 tea bags ice cubes 1/4 cup honey or 1/2 cup light brown sugar, to sweeten Orange slices and mint leave for garnish, optional Directions: With a vegetable peeler, peel each orange in a continuous spiral, removing only the outer colored layer of peel. In a large pitcher add honey brown sugar, tea bags and orange peel and pour boiling water over the mixture. Cover and steep 10 minutes. Remove tea bags, squeezing out excess water. Chill tea mixture with peel in a covered container. To serve, remove the peel and pour iced tea over ice cubes in tall glasses. Garnish with orange slices and fresh mint leaves, if desired. "What a terrific recipe! This beautiful tea is refreshing and soothing. It has a wonderful sweet orange flavor. Refreshing!" CWT is not a certified dietician or nutritionist. Any nutritional information shared on this site is an estimate counted through measurements and package nutritional information used in each recipe. If calorie, macro counting and other nutritional values are important to you, I recommend running the ingredients through your choice of nutritional calculator you prefer. Calories can vary depending on national brands used per recipe.
- Charcuterie Boards
(shahr-koo-tuh–ree) "Everything you need to know to make the perfect Charcuterie Board including food ideas, recipes, and tips for assembling and displaying your charcuterie board. Even holiday board ideas!" Charcuterie Boards Servings – 8+ Prep Time – 20 Minutes (depending on the size of your board) Ingredients: The most important elements of a charcuterie board are meats, cheeses, savory accompaniments, sweet accompaniments, and crackers. Cheeses : choose a variety of hard and soft cheese, and cheese made from different animals (cow, sheep, goat). Tip: always choose at least one cheese that is familiar to your guests so they feel comfortable diving right in. Hard cheeses : manchego, cheddar (white or orange), swiss, gouda, gruyere, parmesan etc. Soft cheeses : brie, triple cream, goat cheese, havarti, burrata, cream cheese with pepper jelly or cranberry sauce on top (my favorite!). You could also use crumbled cheeses like blue cheese, feta or gorgonzola. Meats : prosciutto, ham, pepperoni, hard salami, cured chorizo, capicola, soppressata, summer sausage, turkey, roast beef, etc. Savory accompaniments ( Accoutrement) : Nuts : almonds, candied pecans, pistachio nuts, cashews, macadamia nuts, honey roasted or Spanish peanuts, etc. Briny, pickled or marinated : olives, cocktail onions, cornichons, dill pickles, pepperoncini. I personally love stuffed green olives, and I also like including olive tapenade and bruschetta. Savory Dips and spreads : This Cranberry Orange Cheeseball , whole ground mustard, my Roasted Red Pepper Hummus , ranch, balsamic dip, or my Raspberry Honey Mustard Dip . Veggies – any of your choice, cold and cut into sticks or coins, if desired Sweet accompaniments ( Accoutrement) : Fresh fruit and berries : grapes, pears, orange slices, raspberries, blueberries, blackberries, strawberries. Dried fruit: apricots, cinnamon apples, cherries, figs, pineapple slices, mangos, or coconut slivers. Sweet spreads: Fig butter, orange or apricot marmalade, blackberry jam my Ginger Snap Butter or other sweet spreads. Chocolate : a few pieces of quality dark chocolate, caramel filled chocolate squares or chocolate covered nuts. Crackers: choose a variety of crackers, even sliced baguette or mini toasts of different shapes, sizes and flavors. Some of my personal favorites include thin crispy water crackers, pretzel thins, seeded crackers , pita strips, and cranberry sunflower seed crisps. Directions: Choose your board: The size of your board or plate DOES matter! It really depends on the number of people you are serving and it can be as large or small as you like! If you have a lot of people to serve or simply want a larger variety of food (dips, sandwiches, desserts, etc), you could always use multiple boards. Any board will work; cutting board, serving tray, or even your countertop! Another of my favorite ways to serve a large crowd is not even using a board or plate but simply laying a large piece of butcher paper all the way down your counter top or island if you have one. Then put piles of food and arranged meats and cheeses right on the butcher paper! (Simple and easy to clean up after the party is over.) Start with the cheese: I start with the cheese because its sets the stage on the board. It's the beginning of the background to your art piece! Work with odd numbers, so, depending on the size of your party, choose 3, 5, or 7 types of cheeses to place around the board. Fold and add the meats: As I always say, play with your food, find fun ways to fold cured meats before placing them on the board, like folding them in half and fanning them out like a dec of cards, or folding them in half twice, so they are easy to grab. For thin meat (like prosciutto) fold and lay them in a light and airy ribbon. Add savory and sweet accompaniments: Fill in some of the gaps with savory and sweet. Separate colors in a way that allows the brightest colors to stand out and place foods together that pair well together. For example, mustard, briny foods and nuts near salami and sopresseta, and sharp cheeses like parmesan. Pair sweet accompaniments like fresh fruit, jams, and candied nuts, near the brie cheese or goat cheese. Cheddar cheese pairs well with savory and sweet. Fill in all the extra space with crackers: Look for gaps in the board and spread crackers all throughout. Fill in any remaining space with extra small nuts or fruit. Keep it simple! This may seem obvious, but design your board based on the people who will be eating from it and fill it with simple foods that people actually LIKE! When in doubt, avoid fancy and expensive cheeses, nuts, crackers or condiments that the people you’re serving may not care for. Make it COLORFUL ! I love to add color through fruit, like bright red apples, green and red grapes, strawberries, raspberries or blueberries. Where to Shop: I find most of my favorite charcuterie items at my local grocery stores, or wholesale warehouses for large groups (this can save you a ton of money!) Notes: Fall Charcuterie: Include small pumpkins to decorate your board, use seasonal vegetables like pears, Roasted Pumpkin Seeds , and fall themed dips like whipped caramel apple dip or fall desserts like thinly sliced pumpkin bread or mini healthy pumpkin muffins! Christmas Charcuterie: Shape your meats, cheese, and crackers into the shape of a Christmas tree or include a few small Christmas treats like Sugar Cookie Truffles or Christmas Cornflake Wreaths! Scattered cranberries around your board add a nice a seasonal touch. Dessert Charcuterie: Make chocolate dipping sauce and surround it by strawberries, bananas, apples, pretzels, marshmallows, graham cracker sticks, Scottish Short Bread Cookies , etc. Valentine’s Charcuterie: Shape your meats, cheese, and crackers into a giant heart and include Chocolate Covered Strawberries, conversation hearts, and cinnamon gummy bears. Kids parties: Lay a large piece of butcher paper on your counter and fill it with piles of kid friendly food including fruit, veggies sticks and coins, dips, chips, Donuts , mini sandwiches, popcorn, cheese sticks, crackers, juice boxes, etc. Nutrition: This count is particularly off the boards made in the pictures below. Depending on the size of your board and the ingredient choices will differ the nutritional count. Calories: 240 | Carbohydrates: 15g | Protein: 10g | Fat: 16g | Saturated Fat: 8g | Trans Fat: 1g | Cholesterol: 45mg | Sodium: 607mg | Potassium: 120mg | Fiber: 1g | Sugar: 7g | Vitamin C: 1mg | Calcium: 85mg | Iron: 1mg "This recipe is a keeper. Remember to play with your food and enjoy making an art piece." CWT is not a certified dietician or nutritionist. Any nutritional information shared on this site is an estimate counted through measurements and package nutritional information used in each recipe. If calorie, macro counting and other nutritional values are important to you, I recommend running the ingredients through your choice of nutritional calculator you prefer. Calories can vary depending on national brands used per recipe.
- Aunties Potato Salad
" I have enjoyed this recipe for years since I was a child, and now it has gone with me through the years. The secret to this recipe is the sweet pickles. You can also trade the mayo for salad dressing. " Aunties Potato Salad Servings – 8 Prep Time – 25 Minutes Chill Time – 15 Minutes Chill Time - 3+ Hours Ingredients: 5lbs potatoes, peeled and chopped 10 eggs 1 large onion, chopped 1 (24 ounce) jar sweet pickles, drained and chopped 2 cups mayonnaise Paprika for garnish, optional Directions: Place the potatoes in a large pan of water and boil over medium-low heat until tender, about 12 minutes. Drain the potatoes, and place in the refrigerator to cool. Place the eggs in a saucepan of cold water over medium heat and bring to a full boil. Turn off the heat, cover the pan, and allow the eggs to sit in the hot water for about 15 minutes. Cool the eggs thoroughly under cold running water and shell them. Chop the cooled eggs and place them in a large salad bowl. Stir the onion, sweet pickles, and mayonnaise into the eggs, and let the mixture chill in the refrigerator at least l/2 hour to blend the flavors. Add the chilled chopped potatoes to the egg and mayo mixture. Refrigerate for at least 1/2 hour, 3 hours to overnight is best. Sprinkle with paprika. Serve cold. Nutrition: Calories 788 / Total Fat 51g / Saturated Fat 9g / Cholesterol 253mg / Sodium 806mg / Carbohydrate 72g / Dietary Fiber 7g / Sugars 20g / Protein 15g / Vitamin C 58mg / Calcium 127mg / Iron 4mg Potassium 1397mg " This is the potato salad I grew up on. There were three of us, the oldest liked it plain no pickles and onions, the second oldest didn't like it at all, and the youngest (me) ate it with everything. Whenever there was a cookout, my request was always Aunties Potato Salad and Mom's Macaroni salad (minus the celery salt - then... Now I like it). This one... instantly brings me back to childhood. It's Excellent! " CWT is not a certified dietician or nutritionist. Any nutritional information shared on this site is an estimate counted through measurements and package nutritional information used in each recipe. If calorie, macro counting and other nutritional values are important to you, I recommend running the ingredients through your choice of nutritional calculator you prefer. Calories can vary depending on national brands used per recipe.
- Churro Cheese Cake Bars
Aka - Sopapilla Cheese Cake Bars "What’s better than a churro? Churro flavored cheesecake! This incredible recipe is made with only 7 ingredients and it comes together in minutes. It’s flavored with lots of cinnamon sugar, a buttery flaky crust, and sweet and tangy cream cheese filling. This is one of those recipes that you’ll come back to again and again. It’s great for feeding a crowd, it always tastes delicious, and it’s super easy." Churro Cheese Cake Bars - Aka Sopapilla Cheese Cake Bars Servings – 16 Prep Time – 20 Minutes Chill Time – 28 Minutes Ingredients: Cinnamon sugar: 1 tablespoon ground cinnamon 1/2 cup granulated sugar Cheesecake bars: Two 8-oz packages refrigerated crescent roll dough or sheets 16 oz full fat cream cheese, softened 3/4 cup granulated sugar 1 large egg 1 1/2 teaspoons vanilla extract 3 tablespoons unsalted butter, melted and cooled slightly Optional toppings: Dulce de leche or salted caramel sauce Chocolate sauce Honey Vanilla ice cream Fresh strawberries Directions: Cinnamon sugar: Combine cinnamon and sugar. Set aside. Cheesecake bars: Preheat oven to 350°F with a rack in the middle of the oven. Grease a 9×13 baking pan and sprinkle 1-2 tablespoons cinnamon sugar in the bottom. Open one tube of crescent rolls. Unroll the dough and press the seams together to form one rectangular piece. Place into the bottom of the prepared 9×13 baking pan, it should cover the whole bottom of the pan. Combine cream cheese, sugar, egg, and vanilla, beating until smooth and well combined. Pour the cream cheese mixture over the crust and spread into an even layer. Using the second tube of crescent roll dough, unroll and press the seams together (just like you did with the first one) and place it over the cream cheese layer. It should cover the cream cheese completely. Pour melted butter over the top and spread it into an even layer (I use the back of a spoon). Sprinkle with remaining cinnamon sugar. Bake for 26-30 minutes, until the crescent dough has puffed and is golden brown. Place on a wire rack to cool completely, then transfer to the fridge until chilled. Once chilled, cut and serve. Nutrition: Calories: 284 | Carbohydrates: 29g | Protein: 3g | Fat: 18g | Saturated Fat: 10g | Polyunsaturated Fat: 3g | Monounsaturated Fat: 4g | Trans Fat: 1g | Cholesterol: 45mg | Sodium: 315mg | Potassium: 45mg | Fiber: 1g | Sugar: 20g | Vitamin C: 1mg | Calcium: 35mg | Iron: 1mg "You can make this with low fat cream cheese and stevia for a more healthy and less sugar version. Topped with strawberries and a tiny bit of condensed milk… Deelish" CWT is not a certified dietician or nutritionist. Any nutritional information shared on this site is an estimate counted through measurements and package nutritional information used in each recipe. If calorie, macro counting and other nutritional values are important to you, I recommend running the ingredients through your choice of nutritional calculator you prefer. Calories can vary depending on national brands used per recipe.
- Macaroni Salad
"This flavorful macaroni salad is easy to make and is the perfect crowd-pleasing dish to bring to your next picnic or potluck. This was another staple from my childhood summers!” Macaroni Salad Servings – 10 Prep Time – 20 Minutes Cook Time – 10 Minutes Chill Time - 3+ Hours Ingredients: 1lb elbow macaroni 1 teaspoon salt 1 1/2 cup mayonnaise 1 ½ teaspoons celery seeds ½ teaspoon ground black pepper 2 stalks celery, chopped 6 stalks green onion, chopped 1 can spam, chopped 1 red bell pepper, seeded and chopped ¼ cup grated carrot, optional 1 can black olives, sliced, optional 2 tablespoons chopped pimento peppers, optional Directions: Gather all ingredients. Bring a large pot of lightly salted water to a boil. Cook elbow macaroni in the boiling water, stirring occasionally, until tender yet firm to the bite, about 8 minutes. Rinse under cold water and drain. Mix mayonnaise, pepper, celery seeds, and macaroni together in a large bowl. Stir in celery, green onion, red pepper, spam, carrots, olives and pimentos. Refrigerate salad for at least 4 hours before serving, but preferably overnight. Nutrition: Calories 788 / Total Fat 51g / Saturated Fat 9g / Cholesterol 253mg / Sodium 806mg / Carbohydrate 72g / Dietary Fiber 7g / Sugars 20g / Protein 15g / Vitamin C 58mg / Calcium 127mg / Iron 4mg Potassium 1397mg " This is the macaroni salad I grew up on. Whenever there was a cookout, my request was always Aunties Potato Salad and Mom's Macaroni Salad (minus the celery salt - then). This one... instantly brings me back to childhood. It's delicious! " CWT is not a certified dietician or nutritionist. Any nutritional information shared on this site is an estimate counted through measurements and package nutritional information used in each recipe. If calorie, macro counting and other nutritional values are important to you, I recommend running the ingredients through your choice of nutritional calculator you prefer. Calories can vary depending on national brands used per recipe.
- Enchilada Sauce - Red
Ten Minute Recipe " Ready in only 10 minutes, this easy enchilada sauce is super simple to make and requires no dried chiles! When you’ve got a craving for some Mexican food but don’t have a jar of enchilada sauce in the pantry, this recipe will save the day! " Enchilada Sauce - Red Servings – 2 1/2 Cups Prep Time – 10 Minutes Chill Time – 15 Minutes Ingredients: 2 tablespoons chili powder 1 teaspoon onion powder 1 tablespoon garlic powder 1/2 teaspoon ground cumin 1/4 teaspoon dried oregano 2 tablespoons brown sugar 8oz can tomato sauce 12 oz tomato paste 1 tomato paste can of water, to thin sauce if it's to thick Directions: In a medium sauce pan add can of tomato sauce and paste. Stir over medium heat until smooth, about 5 minutes. Add the chili powder, onion powder, garlic powder, cumin, brown sugar and dried oregano and whisk together for 30 seconds, or until mostly all seasonings dissolve. Add a tablespoon of water at a time if the sauce is to thick, and thin to your liking. Whisk the enchilada sauce until completely smooth. Bring to a simmer, an additional 5 minutes remove from heat, and serve. Notes: Storage : This sauce can be stored in an airtight jar in the fridge for up to 1 week or in the freezer for up to 3 months. Concerned this may be too spicy? Start with using only half of the chili powder and add more to taste. *You can use this in enchilada soup, kick up your tortilla soup or even as a dipping sauce. Nutrition: Calories: 113 | Carbohydrates: 9.34g | Protein: 2.65g | Fat: 8.47g | Saturated Fat: 1.18g | Sodium: 1008.38mg | Potassium: 275.43mg | Fiber: 3.29g | Sugar: 1.8g | Vitamin C: 1.75mg | Calcium: 34.39mg | Iron: 2.1mg "So easy and it tastes marvelous! Most ingredients are already in your pantry cupboard. You will never want t buy canned sauce again!" CWT is not a certified dietician or nutritionist. Any nutritional information shared on this site is an estimate counted through measurements and package nutritional information used in each recipe. If calorie, macro counting and other nutritional values are important to you, I recommend running the ingredients through your choice of nutritional calculator you prefer. Calories can vary depending on national brands used per recipe.
- Crispy Ranch Potato Wedges
AKA - Kartoffelecken " Super easy, crispy oven-baked BEST ever potato wedges with a savory-seasoned outside and fluffy inside, served with the most amazing two-ingredient sauce! " Crispy Ranch Potato Wedges Servings – 4 Prep Time – 10 Minutes Cook Time – 40 Minutes Ingredients: 2 pounds red potatoes - about 6-8 potatoes 2 tablespoons oil 1 packer of ranch dressing seasoning - you will use 3 tablespoons 1 teaspoon smoked paprika - may substitute regular paprika 1 teaspoon garlic powder pinch black pepper Dipping Sauce 1/3 cup mayo - regular, or reduced fat 1/3 cup bbq sauce - any favorite bbq sauce works Directions: Preheat oven to 425 degrees. Line a large, rimmed baking sheet with parchment. Cut the potatoes into about 8 wedges - 1/2 inch thick on the wide edge, if your potatoes are larger, cut any larger wedges in half again. Pat the potato wedges dry with paper towels to absorb excess starch. In a large bowl, combine potato wedges and oil, toss to coat. Stir together paprika, garlic power, ranch seasoning powder, and pepper. Sprinkle over potato wedges and toss to coat. Transfer potato wedges to your prepared baking sheet, arranging them in a single layer so they aren't overlapping, and doing your best to have them not touching - it's ok if some do. Bake for 20 minutes. Remove from oven, turn over the potato wedges with fork or tongs. Return to oven for 15 minutes. While potatoes are baking, stir together mayo and bbq sauce, set aside in the refridgerator. Potatoes should be appear browned and crispy on the edges and be fork-tender. Serve with dipping sauce. Notes: Serving size: Serves six as an appetizer, four as a side dish. Parchment paper: The parchment paper is key to achieving a really crispy, faux-fried exterior on the potato wedges. If you don’t have parchment paper, don’t stress! Simply lightly grease your baking sheet and proceed with the recipe, your potato wedges will be delicious! Paper towel trick: Many recipes suggest soaking your potatoes to rinse off the excess starch and then letting them sit out for a period of time to dry off after soaking. I’ve found this step to be unnecessary – I simply lay all of my wedges out on paper towels, then take a couple of extra paper towels and rub them across the cut sides of the wedges to wipe off excess starch. They come out super crispy every time with no soaking or drying time needed! Alternate dipping sauces: Fry sauce 1/3 cup mayo & 1/3 cup ketchup (always 50/50). Other sauce suggestions include ketchup, ranch dressing, blue cheese dressing, fry sauce or my garlic aioli ! Nutrition: Calories: 262 | Carbohydrates: 31g| Protein: 3g| Fat: 14g | Saturated Fat: 2g | Trans Fat: 1g | Cholesterol: 5mg | Sodium: 658mg | Potassium: 743mg | Fiber: 3g | Sugar: 8g | Vitamin C: 13mg | Calcium: 23mg | Iron: 1mg " Tonite was the first time I made them and they were amazing. I just followed the recipe and they came out perfect. " CWT is not a certified dietician or nutritionist. Any nutritional information shared on this site is an estimate counted through measurements and package nutritional information used in each recipe. If calorie, macro counting and other nutritional values are important to you, I recommend running the ingredients through your choice of nutritional calculator you prefer. Calories can vary depending on national brands used per recipe.
- Easy Chicken Enchiladas
" These Easy Chicken Enchiladas make the best Mexican dinner! They're stuffed with shredded chicken and cheese, topped with red enchilada sauce and baked. " Easy Chicken Enchiladas Servings – 4 Prep Time – 10 Minutes Cook Time – 20 Minutes Ingredients: 2 cups cooked shredded chicken 2 cups canned enchilada sauce, divided or try my easy homemade Enchilada Sauce 8 corn or flour tortillas - I prefer flour tortillas 2 1/2 cups shredded Mexican-blend cheese, divided salt and black pepper, to taste Toppings: diced onions, chopped cilantro, sour cream, shredded lettuce, cotija cheese. - Optional Directions: Preheat oven to 350ºF. Use a 9x13" baking dish, place 3 tablespoons of enchilada sauce, spread over the bottom of baking dish. In a large bowl, combine the shredded chicken, 1/4 cup enchilada sauce and a generous pinch of salt and pepper. Mix together and taste. Season with more salt and pepper as needed. Wrap the tortillas in a damp paper towel and heat them in the microwave for 1 minute, flipping the them halfway through until all of them are warm and pliable. Assemble the enchiladas by filling each tortilla evenly with the shredded chicken mixture and 1 cup of shredded cheese. Roll the tortillas tightly to close and place in baking dish seam side down. Pour the remaining cup enchilada sauce over the rolled chicken tortillas, top with the remaining 1 1/2 cups shredded cheese, and bake for 20 minutes until the cheese is melted and bubbly. Serve immediately and garnish with desired toppings. Notes: For the chicken: You can use any leftover chicken you have in the fridge, use a store-bought rotisserie chicken, or you can make your own shredded chicken at home. For the enchilada sauce: I highly recommend making your own using this easy enchilada sauce recipe. If you’re short on time, you can use your favorite store-bought sauce. (I use canned all the time!) Storing and Freezing: To store enchiladas, place them in an airtight container and refrigerate for up to 4 days. To freeze, let them cool completely in the fridge, then transfer them to a freezer-safe container or freezer bag and freeze. You can also wrap the enchiladas completely in aluminum foil. Nutrition: Calories: 371 | Carbohydrates: 25g | Protein: 24g | Fat: 19g | Saturated Fat: 10g (50%) , Polyunsaturated Fat: 1g | Monounsaturated Fat: 0g | Trans Fat: 0g | Cholesterol: 50mg | Sodium: 800mg | Potassium: 130mg | Fiber: 4g | Sugar: 4g | Vitamin C: 0mg | Calcium: 420mg | Iron: 1.1mg "I had so much fun playing and planning in the kitchen with this delicious recipe. I have taken the intimidation out of cooking from scratch for you!" CWT is not a certified dietician or nutritionist. Any nutritional information shared on this site is an estimate counted through measurements and package nutritional information used in each recipe. If calorie, macro counting and other nutritional values are important to you, I recommend running the ingredients through your choice of nutritional calculator you prefer. Calories can vary depending on national brands used per recipe.
- Bana-nutter Biscuits
" This simple dog biscuit recipe can be made in no time at all in just one bowl with only 4 ingredients and a wooden spoon! You can cut them into any shapes that you like. T hese homemade peanut butter banana dog treats are biscuits your dog will love! " Bana-nutter Biscuits Servings – 20 cookies - using a 3" cutter Prep Time – 15 Minutes Cook Time – 11 Minutes Ingredients: 1 1/4 cups whole wheat plain flour, see note 1/3 cup peanut butter that does NOT contain Xylitol smooth or crunchy 1 small banana, peeled and mashed 3 tbsp cold water Directions: Preheat your oven to 350°F Add the whole wheat plain flour, peanut butter and mashed banana to a large mixing bowl. Mix all the ingredients together with a wooden spoon or spatula. Stir and mash together until well combined and crumbly. Add water a tablespoon at a time, mixing with your hand between each addition until you have a smooth dough. If it's crumbly and not holding together well, add a tablespoon more water. If it feels too sticky and wet, add a tablespoon more flour. You may need more or less water than stated depending on the temperature and conditions of your kitchen, so add it slowly until you reach the right consistency! Flour a rolling pin and a work surface and place your ball of dough on top. Roll out the dough until it is around 1/2" thick. Cut out shapes with your chosen cookie cutters! Using this 3" long bone cutter, I was able to get around 20 dog treats from one batch. Of course I had to double the recipe! Place your biscuit shapes onto your baking tray. They don't spread in the oven so you don't need to leave a lot of space between them. Bake for 10-11 minutes until lightly golden. If you've used a cookie cutter that is larger than 63" long, the biscuits will take a few minutes longer to bake. If you used a smaller cutter, they will need slightly less time to bake. Watch them closely until they appear golden brown on the tops and sides to know they are baked. Leave the baking tray on your countertop for 5 minutes as they will continue to bake on the hot tray. After 5 minutes, remove the biscuits and place them on a wire rack to cool completely. These dog treats will keep well in the fridge for up to 2 weeks, and keep well in the freezer for 4-5 months. If they last that long! Notes: You can substitute whole wheat plain flour with white plain flour, I just prefer to use whole wheat flour as it contains more nutrients than white plain flour. They should also be easier for your dog to digest using whole wheat flour. You can also use alternative flours such as coconut flour or almond flour, though you may need more or less water than stated. Add water a tablespoon at a time until your dough is the right consistency; soft and smooth, not crumbly or sticky! "This recipe is a keeper. They might last a little longer if the dog doesn’t keep chasing me around for more when I bake them!" CWT is not a certified dietician or nutritionist. Any nutritional information shared on this site is an estimate counted through measurements and package nutritional information used in each recipe. If calorie, macro counting and other nutritional values are important to you, I recommend running the ingredients through your choice of nutritional calculator you prefer. Calories can vary depending on national brands used per recipe.
- Bridal Floral Bouquet
"I decided to tackle a project I have always wanted to try for my own wedding. Yup... This pretty bouquet was for me when I married the love of my life! I made one for my Maid of Honor and even the Boutonnieres for the Groom and Groomsman! I had a lot of fun shopping for the flowers, Hubby even had his input which makes them even more special. Here, I will share just how I made them..." Materials: Shears (scissors will do the job if you don't have shears) String Floral tape Ribbon, about 60" long You can choose silk or fresh. The possibilities are endless! The flowers that I recommend using are: Avalanche rose Statice Limonium Peony Hydrangeas Green trick dianthus Phlox Eucalyptus White lisianthus Bloomed Roses Calla Lillies Directions: I will show you how to make your own bridal bouquet, which is perfect for the big day, whether it is a spring, summer, autumn or winter occasion, and whether it is your own wedding or that of a friend, relative or loved one. With bridal bouquets becoming more expensive or source, I'll show you how to make your own in a way which will look spectacular as the lucky lady walks down the aisle! This bouquet may look intimidating, but it is actually really simple and easy to make! You will probably already have almost all of the equipment needed, but you may need to get hold of ribbon in the color of your theme and floral tape. You can find floral tape in most gardening stores, dollar stores or online, and it's really cheap and easy to get hold of! Traditionally, most flowers in a bridal bouquet stick to the colors of white, with some splashes of pink or other pastel colors. But today a lot of bridal couples are choosing to think out of the box and becoming much more modern. As a result, you can see in my bridal bouquet I have gone with the more modern style with the main color being a purple plum theme. However, you should choose colors and flowers to match what you want! If you have a colored theme to your wedding, a bouquet is a great item to match to the theme to ensure that it is coherent throughout your big day! Step 1: Get Rid of the Leaves The first step in making any bouquet or flower arrangement is to remove all of the leaves from the stem area. Gently remove each leaf delicately, you don't want to damage the stem. If you are using silk floral, push leaved to the top of the under area of the flower bulb. This is so they peek out of the flowers and add green to the bouquet. Step 2: Pick Your First Flower The first step is to choose a focal flower. This means choose a flower that you want to be the center of attention within your bouquet. I used the the dark eglplant purple rose to be the center of my bouquet. You should then hold the flower with your fingers near to the blossom end. Step 3: Add Another Flower Add the next flower at an angle facing towards the left of your center flower. It should remain so that the bloom is at the same height as that of your focal flower. This sets you up for the coming steps and ensures that your bouquet will be well filled and rounded. Step 4: Continue Adding Flowers Every time you add a flower, rotate the bouquet rightward a quarter turn to position the bouquet ready for the next flower to be added diagonally, angled leftward as before. Step 5: Add Filler Flowers Once you've go the bulk of your bouquet ready, you can insert some filler flowers between the flowers you already have. These are usually the smaller, green flowers which give a natural look to the bouquet. One tip is to ensure that you put all of the filler flowers in at the same angle in order to ensure that your bouquet stays symmetrical and isn't all over the place! Trust me, I have made that mistake and had to start all over again. But, that's part of crafting... It's an art! Step 6: Tie the Flowers Together Your hand is probably aching from holding the flowers for all this time right? You can finally let go now, just one more step! Tie a tight knot at the highest point of the stem that you possibly can. This will keep all of your flowers held together tightly and looking beautiful and symmetrical. Then make sure to cut off any excess string so that it can't be seen as you or the lucky bride walks down the aisle. Step 7: Cut the Stems This step is important not just to ensure that your flowers look great, but also so that it is practical! If you or the bride will be holding the bouquet for a while, you want to make sure there is room to hold it comfortably. I recommend that you measure two hands lengths from the string, and add an additional inch of wiggle room to make sure that it is comfortable to hold the bouquet if the bride will be holding it for a long time. 9 times out of 10 this is the case! Step 8: Wrap the Stems Together This is where the floral tape comes in, as you wrap the stem from the top downwards. This will ensure that the flowers are firmly held in place until and on the big day. Be careful not to wrap all the way to the bottom, but instead to wrap just over the size of one hand. This way the bouquet will keep its natural look but has plenty of floral tape to do the job of holding everything together firmly. If you are using silk florals, you can use the floral tape all the way to the bottom, covering and wrapping the bottom stems multiple times and then working your way back up to the center of the stems with the tape to endure all the metal centers are covered. Step 9: Add Ribbon Adding the ribbon is one of the more "complicated" stages so pay attention to this step to ensure that it looks gorgeous! In a lot of cases, ribbons will be shiny on one side and matte on the other side so I'll instruct you on how to do this with this kind of ribbon. If your ribbon is the same on both sides, don't worry, just ignore the references to shiny or matte! First, place the shiny side of the ribbon facing the stems the long way direction of the stems so that the matte side is visible to you. Lay the end you will not be using to wrap the stems over the top of your flowers. Taking the other end, make a 45 degree angle triangle shape to show the shiny side and tart wrapping the around the stems, wrapping to about 1 /1/2" from the bottom and then back up to the base of the flower bulbs. Tie ribbon in a knot and then take the remainder of the ribbon you laid over the flowers to make a bow. If you prefer to glue it together for a tight look, start by placing the ribbon matte side down and wrap the stems until they are semi covered or fully covered if using silk florals. Don't want the wires sticking out or poke the bride and make pulls in her dress. I have done this to my normal clothing. Step 10: Congratulations and Enjoy Your Creation! The final step is to enjoy the wedding! Whether the bouquet is for your wedding or a friend, relative or loved one's, make sure that they have a great day and enjoy showing off their bouquet to everyone. Make sure they are careful with the delicate flowers, until it comes to the throwing of the bouquet! Congratulations to the bride and groom! Notes: Keep your bouquet in water until you are ready to walk down the isle. Best to also keep them refrigerated until the event if possible. Bouquet will last about two days for the best quality if kept in water and refrigerated.
- Boutonniere or Corsage
"I have made this multiple times over my lifetime. For Proms, Winter Balls, Homecoming dances, baby showers, and even just for special birthday events. I decided I have to make them for my own wedding. Yup... These pretty boutonnieres were for my Groom and his Best Man! Are you wondering how to make a boutonniere and corsage? Many DIY wedding brides and couples have asked me for advice on this topic, and of course, I am more than happy to help! These two types of flower arrangements are important because they serve to honor some of the most important people of the day. From the Mother of the Bride to the Ring Bearers, key family and wedding party members wear these little arrangements to signify their BIG role in the couple's lives. Materials: Scissors Floral Tape Ribbon Pear-head Pins A Lateral Greenery : This is a long line of leafy greenery, like used in my design. One to Two Filler Flowers: These flowers have smaller blooms, and serve to fill in the gaps of your boutonniere. Popular filler flowers include baby's breath, statice, and heather. One to Two Focal Flowers: These flowers are the main flower in your design, and are the star of the show. I used purple roses in my husband's to match my bouquet! Directions: Learning how to make a corsage and boutonniere along with the flower bouquets is a great skill to have, not only because it will help you save money on wedding flowers, but because it will come in handy for other events too. You may need these flower arrangements for future proms, galas, date nights, and more! Adding flowers to your formal attire helps take your look to the next level while also highlighting your personal style. DIY-ing these flower arrangements can be simple and easy. I have developed a step by step guide to help you master the art of designing while taking the guess work out of these special pieces. Keep scrolling to learn my process! As you design yours, and you find a simple trick to help, feel free to comment and leave your ideas to share with someone else on the same DIY journey! Step 1: Gather Your Boutonniere Supplies Start by gather ing all of the floral tools and supplies you will need to create your arrangement. Tools are listed above. Once you have chosen the flowers you would like or that suit your seasons occasion follow along belong for tips on storing them once you make your artwork! As you explore how to make a boutonniere, you may want to consider ordering flowers in bulk to save time and money. You can choose to make them with fresh or silk flowers. If you aren't sure what specific blooms you want in your arrangements, you can start off shopping by color, or can try a DIY Flower Combo which comes with an array of different types of flowers to match your color palette or style! Once your flowers arrive, or you find them at your local floral or crafting store make sure to trim their stems, hydrate them in cool water, and store them in a dry, dark, and cool place. The refridgerator is the best place, for fresh flowers. Silk flowers of courase can be stored almost anywhere, away from pets, or children. And definitely store them where they won't be crushed. Step 2: Cut Your Stems to the Length of Your Boutonniere Then, cut each of your flower and greenery stems down to 1.5-2 inches in length. Step 4: Strip Off Extra Leaves Remove any excess leaves, thorns and foliage from the lower half of each stem to make room for the floral tape. Keep the ones that are closets to the bloom to add more greenery. Step 5: Your Greenery and Focal Flower(s) Arrange one to two stems of lateral greenery behind your focal flower. Secure with floral tape. Step 6: Add Some Filler Flowers Place a stem of filler between your greenery and focal flower to add dimension. Secure this section with addition with floral tape. Step 7: Continue Layering Add another type of filler flower to your arrangement, and then another focal flower if you desire. Continue layering greenery, focal flowers, and fillers until you achieve your desired look. You can be simple as one flower or multiple, and the same goes for your filler. Play with your art! Tape all of the stems together, leaving some part of the stems exposed at the bottom. Trim and even out the bottom of the stems if needed. Step 8: Finish Your Boutonniere with Ribbon and a Pin or Two Finally, wrap the taped stems in ribbon of your color choice. Start the ribbon at the bottom of the taped section, and wrap around until you reach the base of the flowers. Tie your ribbon off in a knot, stick with a pin, and enjoy the fact that you now know how to make a boutonniere! Wrist Corsage Creating your DIY corsage will look similar to creating a boutonniere at first. The first step is to gat her the supplies that you'll be using for your arrangement. For corsages, we recommend having these tools on hand: Materials: Scissors Floral Tape Ribbon Wristband or Pins A Lateral Greenery : This is a long line of leafy greenery. One to Two Filler Flowers: These flowers have smaller blooms, and serve to fill in the gaps of your boutonniere. Popular filler flowers include baby's breath, statice, and heather. One to Two Focal Flowers: These flowers are the main flower in your design, and are the star of the show. Directions: Step 1: Gather Your Corsage Flowers and Supplies to Match Your Boutonniere Next, you'll want to gather your greenery and flowers. I use the same flowers to match the boutonniere, just in a slightly higher quantity. If you're crafting matching boutonnieres and corsages, you may want to use the same flowers for each. Plus, this makes it easier to buy your blooms in bulk, saving you some money and effort! On the other hand, if you want your corsages and boutonnieres to feature different blooms, that's totally fine too. Remember: it's your design. Have fun with it! Step 3: Cut Your Stems Learning how to make a corsage may feel a little more familiar after you've practiced making a boutonniere. Similarly to the How to Make a Boutonniere tutorial above, your design process will start by cutting the stems of your flowers and greenery down to 1.5-2 inches in length. Step 4: Remove Leaves from Bottom of Stems Again, you'll want to remove the leaves from the bottoms of both your flowers and your greenery. This makes wrapping your corsage in tape and ribbon a lot easier later on. Step 5: Start with Your Focal Flower and Greenery Layer one to two stems of greens behind your focal flower, and secure them together with floral tape. Step 4: Add Some Filler Flowers Then, place a filler between the greenery and flower. Add more tape to secure the stems together. Then add your second, bigger type of filler flower, and secure this as well. Step 5: Add a Bow to Your Corsage If you desire, tie a bow with the ribbon that was used in your boutonniere, and secure it to the stems of your flowers so far using tape. As you add more blooms to your arrangement, the bow will be positioned in the middle of your arrangement, and hide the tape so position it accordingly! Step 8: Layer the Rest of Your Flowers Next, continue layering greenery, focal flowers, and filler until you have your perfect design. You will usually want around three layers of stems, with around two focal flowers in your arrangement. Continue securing with tape after every other stem. Step 9: Finish Taping Finish with one last taping of all stems, leaving the bottom half of the stems exposed. Step 10: Wrap Your Corsage in Ribbon Finally, wrap your floral tape in the ribbon of your choice, starting at the bottom of the taped stems, and wrapping all the way up to the base of the flowers. Tie off in a knot. Step 11: Secure to A Corsage Wristlet or Pins When creating a wrist corsage, attach your arrangement to a wristlet. If your wristband comes with attached strings, tie these to the middle of the flower arrangement, and then at the bottom. When creating a pin-on corsage, add a pin to your ribbon-tied stems.
- Almond Biscotti Cookies
" Biscotti is an Italian word meaning "twice baked". This refers to the traditional method of baking biscotti twice: once to form individual logs, and then again after slicing them into individual pieces. This double-bake process gives biscotti their signature crispy texture. " Almond Biscotti Cookies Servings – 24 Prep Time – 10 Minutes Cook Time – 40 Minutes Ingredients: 2 cups all-purpose flour 1/4 teaspoon salt 1 teaspoon baking powder 1 cup sugar 4 Tablespoons butter, room temperature 2 large eggs zest of 1 large lemon, or you could use 1 teaspoon finely grated orange zest 1 Tablespoon almond extract 1/2 teaspoon vanilla extract 1 cup whole almonds toasted and coarsely chopped powdered sugar for garnish, optional Directions: Preheat the oven to 325ºF. Position a rack in the center of the oven. Line 2 baking sheets with parchment paper, set aside. Combine the flour, salt, baking powder in a medium bowl and mix together thoroughly. In a large bowl with an electric mixer, beat the sugar, butter, eggs, lemon zest, almond extract and vanilla extract for 2 to 3 minutes, until thick and pale. Add the flour mixture to the mixing bowl a little bit at a time. Add in toasted/chopped almonds and mix on medium-low speed until all the ingredients are moistened. Let the dough rest a couple of minutes in the mixer bowl. Split the dough in half, scrape, out each half on the two prepared cookie sheets with a rubber spatula. Spray hands with cooking spray then shape each section of dough into a flattened log, about 3 inches wide and 12 inches long. Bake until dough is firm but gives slightly when pressed, about 20-25 minutes. Transfer sheet to a wire rack and let logs cool completely, about 30 minutes. Reduce oven temperature to 300 degrees. Transfer the first loaf carefully to a cutting board. When the logs have completely cooled down, begin slicing the first log by pressing a very sharp knife straight down into the dough. Place the cookies back on the baking sheet, cut sides up. Keep in mind that the when you slice on a bigger angle, you will get much longer cookies. If you slice short angles, you’ll get small biscotti. Place the second log on the cutting board and repeat process cutting out the cookie pieces and placing on the baking sheet. Bake 7 minutes, flip biscotti, and bake 7 minutes more. Set the sheet on a rack to cool completely. Garnish with powdered sugar if desired right before serving. Store in an airtight container on the counter for up to 3 days. After 3 days, safest to store in the refrigerator. Are biscotti a healthier style cookies? Biscotti have a reputation for being healthier than cookies, and there is some truth to this. Biscotti contain fewer calories per serving than cookies, as well as less fat and sugar. They are also a good source of fiber, which makes them more filling than regular cookies. Can I freeze biscotti? Yes! As soon as they have completely cooled down, transfer the biscotti to a zipped lock freezer bag. Another option is to wrap them in plastic wrap and place in a freezer safe storage. Other Biscotti versions: For a chocolate twist, replace 1/4 cup of flour with unsweetened cocoa powder and add 1/2 cup of chocolate chips to the dough. Swap the almonds, try using pistachios, hazelnuts, or walnuts for a different nutty flavor. Add raisins, dried cranberries, blueberries, or other dried fruits you love. Enhance the citrus notes by substituting the lemon and orange zest with lime or grapefruit zest. Chocolate Sweetness: For an additional touch of sweetness, drizzle melted white or dark chocolate over the cooled biscotti. Add a dash of cinnamon or cardamom to the dry ingredients for a warm and aromatic flavor profile. For a gluten-free option, substitute the all-purpose flour with a gluten-free flour blend. To make it vegan , replace the eggs with flax eggs = 1 tablespoon of ground flaxseed mixed with 3 tablespoons of water for each egg and use vegan butter. Nutrition: Calories: 106kcal | Carbohydrates: 18g | Protein: 2g | Fat: 3g | Saturated Fat: 0.2g | Polyunsaturated Fat: 1g | Monounsaturated Fat: 2g | Trans Fat: 0.001g | Sodium: 42mg | Potassium: 56mg | Fiber: 1g | Sugar: 9g | Calcium: 28mg | Iron: 1mg " Buttery tasting with a light lemon flavor around the delightful almond biscotti. Great with a cup of coffee or a glass of wine. " CWT is not a certified dietician or nutritionist. Any nutritional information shared on this site is an estimate counted through measurements and package nutritional information used in each recipe. If calorie, macro counting and other nutritional values are important to you, I recommend running the ingredients through your choice of nutritional calculator you prefer. Calories can vary depending on national brands used per recipe.
- Orange Dreamsicle Cookies
"Soft and chewy, quick and easy orange cookies recipe, homemade with simple ingredients. It all starts with a simple cake mix! These cookies are lightly crisp on the outside, but stay soft on the inside." Orange Dreamsicle Cookies Servings – 8 Prep Time – 10 Minutes Cook Time – 10 Minutes Ingredients: 1/3 cup oil 2 large eggs 2 tablespoons orange zest 2 tablespoon o range juice from and orange 2 teaspoon vanilla extract 1 box orange cake mix, yellow cake mix will work if you can’t fine the orange - See note 1 1/2 cups powdered sugar for rolling cookies Orange buttercream frosting , optional for icing top of cookies Directions: In a large mixing bowl , add oil, eggs, orange zest, orange juice, vanilla extract and mix until fluffy. Add cake mix and mix until just combined. Chill dough for 20-30 minutes to make it easier to handle. Scoop out 1” portions of the dough and roll in hands to form balls. Place them on a cookie tray , lined with parchment paper. Bake at 350 degrees for 10-12 minutes or until edges are firm but center is slightly soft. Place powdered sugar in a large bowl, set aside. Cool cookies for 5 minutes, then roll each cookie in powdered sugar. Coating completely. You can let them cool completely if you choose to frost them in place of rolling them in powdered sugar. To frost: Once they cool down, frost them with orange buttercream or drizzle some orange glaze and enjoy! Notes: If you can only find the NEW cake mixes that are 13.25oz this will alter the recipe above. You can add in 1/4 cup of flour to even the cake mix back to the original 15-18.25oz. Nutrition: Calories: 174 | Carbohydrates: 31g | Protein: 1g | Fat: 4g | Cholesterol: 16mg | Sodium: 194mg | Potassium: 21mg | Sugar: 21g | Vitamin C: 1.2mg | Calcium: 57mg | Iron: 0.6mg "I Made these orange cookies for a family cookout… and just WOW, they were a huge hit and are a go-to recipe that pleases everyone." CWT is not a certified dietician or nutritionist. Any nutritional information shared on this site is an estimate counted through measurements and package nutritional information used in each recipe. If calorie, macro counting and other nutritional values are important to you, I recommend running the ingredients through your choice of nutritional calculator you prefer. Calories can vary depending on national brands used per recipe.
- Brownie Cookies
“Everybody gets the coveted chewy brownie edge with brownie cookies! Deep, dark and super fudgy! It’s my favorite brownie cookie recipe. You have to make these brownie cookies, everyone loves them!” Brownie Cookies Servings – 36 Cookies Prep Time – 25 Minutes Cook Time – 8-12 Minutes Ingredients: 1 box Chocolate Brownie Mix 1/2 cup Vegetable Oil 2 eggs 1/3 cup miniature semi-sweet chocolate chips Directions: Preheat oven to 375°F. Coat baking sheets with no-stick cooking spray. Beat brownie mix, oil and eggs in large bowl with mixer on medium speed until dough forms. Stir in chocolate chips. Let batter stand for 15 minutes. Drop by rounded tablespoonfuls onto prepared baking sheets, 2 inches apart. Bake 8 to 9 minutes or until set. Cool 3 minutes on baking sheets. Remove to wire rack to cool completely. " I just can’t get enough of these delicious cookies. I mad a double batch and I only got 2 of them. Next time I will make a double batch and stash one and then help eat the other batch that’s left over! " CWT is not a certified dietician or nutritionist. Any nutritional information shared on this site is an estimate counted through measurements and package nutritional information used in each recipe. If calorie, macro counting and other nutritional values are important to you, I recommend running the ingredients through your choice of nutritional calculator you prefer. Calories can vary depending on national brands used per recipe.
- Quick Marinara Sauce
"Delicious quick and easy Italian East Coast Marinara sauce for your next Italian dish! Ready in 30 minutes for the whole family!" Quick Marinara Sauce Servings – 6 Prep Time – 10 Minutes Cook Time – 20 Minutes Ingredients: 1/4 cup extra-virgin olive oil 2 large cloves garlic thinly sliced 1 tsp garlic Powder 1 Tbsp Italian seasoning 2 28- ounce cans San Marzano crushed tomatoes with their juice 2 14 1/2- ounce cans San Marzano diced tomatoes with their juice 1 tsp Kosher Salt 1 Sprig fresh basil plus 1/2 cup loosely packed basil leaves torn into small pieces (2 Tbsp of dried can be substituted) 1/2 cup Parmesan cheese fresh or grated Instructions: Heat a large, heavy pot over medium-high heat. Add the oil and heat until simmering, almost smoking. Add the garlic and cook, stirring, until golden and fragrant, about 30 seconds. Stir in the tomatoes, salt, garlic powder, Italian seasoning and basil. Keep cooking and stirring until the sauce comes to a boil then lower the heat and simmer, stirring occasionally, until the sauce is thickened and richly flavored, 15-20 minutes. Adjust the seasoning with more salt, if necessary, and stir in the basil leaves. Enjoy! Notes: This sauce is great for dipping, and any pasta dish that requires marinara sauce. "Extra sauce may be refrigerated in an airtight container for up to 2 days or frozen for up to 1 month. Sterilize mason jars and can, storing in a cool dry area for fresh sauce all year long." CWT is not a certified dietician or nutritionist. Any nutritional information shared on this site is an estimate counted through measurements and package nutritional information used in each recipe. If calorie, macro counting and other nutritional values are important to you, I recommend running the ingredients through your choice of nutritional calculator you prefer. Calories can vary depending on national brands used per recipe.
- Oatmeal Raisin Chip Cookies
" These Chewy Oatmeal Raisin Chip Cookies are soft, chewy, thick and come out perfect every time! They will become your new favorite. " Oatmeal Raisin Chip Cookies Servings – 16-18 XL Cookies Prep Time – 15 Minutes Cook Time – 12-14 Minutes Ingredients: 1 1/2 cups old fashioned oats not quick cooking 1/2 cup whole wheat or all purpose flour 1/4 teaspoon baking powder 1/4 teaspoon baking soda 1/2 teaspoon salt 1/2 teaspoon ground cinnamon 6 tablespoons unsalted butter, at room temperature 1/2 cup dark brown sugar, packed 1/4 cup granulated sugar 1 large egg 1 teaspoon vanilla 1/2 cup chopped walnuts, toasted and always optional 1 cup dried raisins 1 cup chocolate chips Directions: Preheat the oven to 350 degrees. Place parchment paper on baking sheet and set aside. In a medium frying pan over low heat, toast walnuts (if using) stirring constantly until aromatic and lightly golden brown. In a large bowl combine flour, baking soda, baking powder, salt, and cinnamon. In a separate bowl cream butter, brown sugar and granulated sugar. Add in egg, vanilla to the butter sugar mixture. Mix well. Slowly add flour mixture to the butter mixture, mix well. Add in raisins, and toasted walnuts (if using). Bake for 12-15 minutes. I baked for 14 minutes and they came out great! " Trust me when I tell you that you’ll add my Oatmeal Raisin Chip Cookie recipe to your list of favorite recipes. They’re just that good! " CWT is not a certified dietician or nutritionist. Any nutritional information shared on this site is an estimate counted through measurements and package nutritional information used in each recipe. If calorie, macro counting and other nutritional values are important to you, I recommend running the ingredients through your choice of nutritional calculator you prefer. Calories can vary depending on national brands used per recipe.
- Banana Cream Pie
"A flaky pie crust is filled with layers of sliced bananas, velvety vanilla custard, and crowned with whipped topping!" Banana Cream Pie Servings – 15 Prep Time – 10 Minutes Chill Time – 4 Hours Ingredients: 1 9 inch flakey pie crust baked and cooled 3 bananas, use 1 sliced for decorating 2 cups cold whole milk 1 3.5 oz package of instant vanilla pudding mix, you can also use french vanilla 1 3.5 oz package of instant banana pudding mix, you can use 2 vanilla if you can't find banana pudding in your area 2 cups frozen whipped topping thawed and divided Directions: Pastry If making a pastry crust, preheat the oven to 425°F. Roll the pie crust into a 12-inch circle. Line a 9-inch pie plate wiht the pastry and fold the edges under. Crimp as desired. Poke the bottom of the crust with a fork. This prevents the crust from bubbling during baking and lets the steam release from underneath. Cut an 11-inch circle of parchment paper and gently place in the pie crust and fill it with dried beans or pie weights. Bake crust for 15 minutes, remove the parchment and beans/weights and then bake for an additional 12 to 15 minutes or until golden. Cool completely. Filling Slice the bananas and arrange around and over cooled pie crust. In a medium bowl, whisk the pudding mixes and cold milk until smooth. Let rest for 3 minutes to thicken. Fold in 1 cup of whipped topping. Spread the pudding mixture over the bananas. Refrigerate for at least 4 hours or overnight. Top with remaining whipped topping and decorate with banana slices and caramel or chocolate shavings if desired. Notes: For a No Bake Graham Crust, combine 6 tablespoons melted butter, 1 ½ cups graham crumbs, and ¼ cup granulated sugar. Press into the bottom and sides of a 9-inch pie plate. Chill for at least 15 minutes before filling. Nutrition: Calories: 293 | Carbohydrates: 47g | Protein: 4g | Fat: 10g | Saturated Fat: 5g | Polyunsaturated Fat: 1g | Monounsaturated Fat: 3g | Cholesterol: 8mg | Sodium: 276mg | Potassium: 241mg | Fiber: 1g | Sugar: 30g | Vitamin C: 3mg | Calcium: 95mg | Iron: 1mg " Banana cream pie is a staple in my kitchen along with a classic apple pie . Banana cream pie can certainly be made from scratch with eggs (either just yolks or whole eggs); however, I love this version because it’s so easy and has a nice thick texture. " CWT is not a certified dietician or nutritionist. Any nutritional information shared on this site is an estimate counted through measurements and package nutritional information used in each recipe. If calorie, macro counting and other nutritional values are important to you, I recommend running the ingredients through your choice of nutritional calculator you prefer. Calories can vary depending on national brands used per recipe.
- Blueberry Yogurt Cake
❤️🔥 Hot Post - +75K Views on Reddit ! No Flour, Oil or Butter - Low Sugar - Gluten Free Option " This dessert recipe is super light, easy, and refreshing. A great alternative to cheesecake. 😌 Perfect for the summer if you are watching your poolside figure! You have to try this one!" This 4 Ingredient Yogurt Cake is the perfect cross between a Flan, Basque cheesecake and a creamy dense NY cheesecake. You don’t need a mixer, flour, butter, or oil to make it. The fact that it’s a healthy and low-calorie option is just icing on the cake - pun intended! 😉 The cake’s texture is soft and creamy, while the taste is rich and tangy, with a subtle sweetness that is perfectly balanced. At first glance, this cake may look like a cheesecake, but the texture is seemingly different. It has a custard-like consistency that is a little firmer, yet still incredibly creamy. Blueberry Yogurt Cake Servings – 6 to 8 Prep Time – 15 Minutes Cook Time – 55 Minutes Ingredients: 2 cups vanilla yogurt 4 eggs 4 Tablespoons + 1 teaspoon cornstarch 2 teaspoons cinnamon, optional 1/2 cup of blueberries or your favorite fruits, add an additional 1/2 cup for garnishing slices. Directions: Preheat oven to 350 degrees. Use a piece of parchment paper to line a 6" spring form pan or cake mold of choice. Use a 9x13" pan and place mold in the center. If using a spring form pan, line the bottom of mold with foil to prevent leakage. In a large bowl whisk eggs and yogurt until well combined. Add cornstarch, and cinnamon; mix together until smooth. You can strain to make sure the batter has no lumps. Add fruit, fold in gently. Reserve a couple for the very top of cake before putting in the oven. Pour batter into pan/mold. Place cake in center of the 9x13" pan, place on oven rack. Pour in boiling water to an inch in height around cake to create a bain-marie (waterbath if you will) . Add additional fruit to top of cake. Bake for 50-55 mins or until the surface is yellow. Let it cool completely. Chill for at least 2 hours or overnight before serving. Slice with sharp knife, garnish with extra fruit, honey and or whipped cream if desired. Notes: Air Fryer Method: 275-300F for 30-35 mins or until the surface is yellow Variations and Substitutions: You can easily adjust this cake to suit your taste preferences and dietary needs. I have tried a few of these alternatives to my tastes, so you may need to experiment and adjust the quantities for your tastes... Remember... Play with your food! 😉 For a sweeter cake you can use flavored yogurt such as strawberry, blueberry, or coconut. You can also use Greek yogurt as well. Add 1/4 cup of sugar to the batter, for a sweeter version. Drizzle the top of the cake with 🍫 chocolate and or caramel sauce, a dollop of whipped cream, sprinkle with chopped toasted nuts or a dusting of powdered sugar for an extra decadent cake. Mmmm a turtle yogurt cake! You can use blueberries, strawberries, raspberries, blackberries, mandarine oranges, peach, or pineapple. You can try canned apples, or even cherries. Add 1-2 teaspoons or more of spices such as cinnamon, nutmeg, or cardamom to the batter for a different flavor profile. Nutrition: Based on 8 servings Calories: 184 | carbohydrates: 15g | protein: 5g | fat: 3g | saturated fat: 2g | sodium: 54mg | fiber: 3g | sugars: 8g "It’s easy and fabulous, and even impressed my friend who is a Johnson & Whales Culinary trained che f!" CWT is not a certified dietician or nutritionist. Any nutritional information shared on this site is an estimate counted through measurements and package nutritional information used in each recipe. If calorie, macro counting and other nutritional values are important to you, I recommend running the ingredients through your choice of nutritional calculator you prefer. Calories can vary depending on national brands used per recipe.
- Easy Cheesy Bread Sticks
Copycat Recipe "Made from 6 ingredients, these easy cheesy breadsticks are a totally irresistible side dish or snack. Brush the dough with a little butter, garlic, herb seasoning, then top with lots of mozzarella or provolone cheese. Less than 15 minutes bake time." Easy Cheesy Bread Sticks Servings – 12 = 24 Sticks Prep Time – 10 Minutes Cook Time – 12 Minutes Ingredients: 1-10 ounce can prepared pizza crust 1 tablespoon butter, melted 1/2 cup provolone or mozzarella cheese, shredded 1 tablespoon parmesan cheese 1 tablespoon dried basil or Italian seasoning 1/2 teaspoon garlic powder Directions: Preheat oven to 425. Unroll pizza dough onto a greased cookie sheet and brush with butter. Sprinkle cheeses and spices evenly over the dough. With a pizza cutter, cut dough lengthwise into 12 long strips. Then cut those in half to make 24 strips. Do not separate strips. Bake for 10-12 minutes or until light golden brown. Recut along each strip and remove from cooking sheet. Serve sticks warm with marinara sauce . Nutrition: Calories: 115kcal | carbohydrates: 13g | protein: 5g | fat: 5g | saturated fat: 2g | cholesterol: 9mg | sodium: 234mg | fiber: 1g | sugar: 1g " These were the BEST breadsticks I have ever made. So good they’re dangerous! " CWT is not a certified dietician or nutritionist. Any nutritional information shared on this site is an estimate counted through measurements and package nutritional information used in each recipe. If calorie, macro counting and other nutritional values are important to you, I recommend running the ingredients through your choice of nutritional calculator you prefer. Calories can vary depending on national brands used per recipe.
- Pain Killer
" The island breeze in a glass! Sweet coconut and pineapple with a splash of rum. Creamy and delicious.” Pain Killer Servings – 1 Prep Time – 5 Minutes Ingredients: Drink: 1oz coconut crème 2oz spiced or regular rum 4oz pineapple juice 1oz orange juice Crushed ice Garnish: Toasted coconut Pineapple chunks Maraschino cherries Instructions: In blender, place handful of crushed ice, coconut crème, rum, and juices. Blend until smooth. Pour into glass, garnish with toasted coconut, pineapple and cherry cocktail pick. Please drink responsibly. Notes: To toast coconut, place 1 cup of sweet shredded coconut in a medium dry frying pan. Heat over a low heat stirring constantly until lightly golden brown. Takes 5 minutes. "The Painkiller is a popular tropical cocktail . It was created in the 1970s at the Soggy Dollar Bar in the British Virgin Islands. It's a fun and fruity mix of pineapple, orange, coconut, and a bold rum. Perfect for a sunny day on the beach or a casual afternoon in the backyard, the recipe is simple, and the drink is delicious!" CWT is not a certified dietician or nutritionist. Any nutritional information shared on this site is an estimate counted through measurements and package nutritional information used in each recipe. If calorie, macro counting and other nutritional values are important to you, I recommend running the ingredients through your choice of nutritional calculator you prefer. Calories can vary depending on national brands used per recipe.
- Easy Strawberry Twinkie Trifle
No Bake Dessert " Trifles are fun to make and the possibilities are endless. All a trifle is, is layers of cake, jams, fruits, pudding and whipped cream.It takes about 20 minutes to make this and gets better after it has sat in the refrigerator a few hours for the flavors to meld together. " Strawberry Twinkie Trifle This is a no bake, no cook recipe that tastes like strawberry shortcake and starts with Twinkies... Yes those famous little snack cakes from our childhood. Made into a very easy to prepare, elegant delcious dessert! Great for meal planning and is a make ahead dessert. Servings – 8 Prep Time – 20 Minutes Chill Time – 3 Hours to overnight Ingredients: 4 packages twinkies - (8 total twinkies), cut in thirds 2 small packages sugar free vanilla pudding, you can used regular pudding I choose sugar free to cut down the sweetness. 1 1/2 cups milk 1 can sweetened condensed milk 1 8 ounce container cool whip, thawed handful toasted almonds or colored sprinkles for garnish, optional 1 quart strawberries, reserve a few slices for garnish, you can always use other berries or make a berry mixture Directions: In a large bowl add pudding mix, milk and condensed sweetened milk. Whisk together until smooth. Let is set several minutes until it starts to thicken. Fold in half of the cool whip. Wash, dry and slice the strawberries into a bowl. Cut each Twinkie into 3 pieces. Place half of them on the bottom of the trifle bowl. Place half of the sliced strawberries over the Twinkies. Pour and spread half of the pudding mixture over the strawberries. Repeat by add the remaining Twinkies, pressing down on them lightly. Add the remaining strawberries and then the pudding. Frost the top of trifle by spreading the remaining cool whip on top. Sprinkle with toasted almonds or colored sprinkles if using. Cover and refrigerate until ready to serve. Notes: If you don't have a trifle dish, you can use a large bowl or you can use a 9x13" baking dish. Slice Twinkies in half lengthwise and lay evenly flat side up in a 9 x 13 inch dish. Place strawberries over Twinkies. Pour pudding mixture over strawberries and frost with remaining cool whip topping. Add optional nuts, sprinkles or extra slices of strawberries on top. You can use other berries such as raspberries with cheesecake pudding, blackberries, blueberries with lemon pudding, mandarine oranges with orange or lemon pudding, or even canned apples with a caramel drizzle. Remember... Play with your food! "Everyone loved this. Easy to make, inexpensive, definitely a keeper. You can make this in to a Birthday trifle for someone special! " CWT is not a certified dietician or nutritionist. Any nutritional information shared on this site is an estimate counted through measurements and package nutritional information used in each recipe. If calorie, macro counting and other nutritional values are important to you, I recommend running the ingredients through your choice of nutritional calculator you prefer. Calories can vary depending on national brands used per recipe.
- Taco Ranch Dip
Low Fat, Low Sodium and Low Calorie Option " This 3-ingredient dip recipe is unbelievably easy to prepare in 5 minutes. Serve chilled with chips, pretzels and veggies! " Taco Ranch Dip Servings – 16 - 2 Tablespoon servings Prep Time – 5 Minutes Chill Time – 2 Hours or overnight Ingredients: 2 cups - 16ounces sour cream or yogurt 1 taco seasoning packet , you can also use low sodium 1 ranch dip mix packet , you can also use low sodium and MSG free Directions: In a medium mixing bowl, add the sour cream or yogurt, taco seasoning, and ranch dip mix. Stir until smooth. Then cover and refrigerate at least 2 hours or until ready to serve. Serve cold with fresh cut veggies, snack crackers, pretzels or chips. Notes: Using the low sodium options you will not taste a difference. It's great for those that need to watch their salt intake. If you substitue yogurt for the sour cream, it may run a little thinner. I prefer plain greek yogurt as it's a thicker consistancy. I don't even taste the difference between it from the sour cream. And it's a healthier choice! Store leftovers covered in the refrigerator for up to 5 days. Nutrition: Calories: 56 | Carbohydrates: 1g | Protein: 1g | Fat: 6g | Saturated fat: 3g | Polyunsaturated fat: 1g | Monounsaturated fat: 1g | Cholesterol: 15mg | Sodium: 33mg | Potassium: 41mg | Fiber: 1g | Sugar: 1g | Vitamin c: 1mg | Calcium: 32mg | Iron: 1mg "This dip is so yummy and it couldn’t be any easier! This is a keeper!" CWT is not a certified dietician or nutritionist. Any nutritional information shared on this site is an estimate counted through measurements and package nutritional information used in each recipe. If calorie, macro counting and other nutritional values are important to you, I recommend running the ingredients through your choice of nutritional calculator you prefer. Calories can vary depending on national brands used per recipe.
- Wild South-West Dip
Low Sodium - Low Fat Option " I had about five ideas running through my brain for this recipe. I narrowed those down to three and then ended up creating the recipe you have now found here! Took a little inspiration from the occasion this was made for and added a little southern flare, hence Wild South-West Dip was created! 🙂" Wild South-West Dip Servings – 24 - 2 Tablespoon servings Prep Time – 15 Minutes Chill Time – 2 Hours, or Overnight Ingredients: 2 cups - 16 ounce container sour cream, I used reduced fat - you can also substitute for plain greek yogurt 1 cup of mayonnaise, I use low fat 1 tablespoon of butter 1 10-12 ounce bag of frozen corn 1 15-oz can low-sodium black beans, drained and rinsed well 1 cup cheddar or Colby jack cheese, shredded 5 scallions / green onions, sliced thin 1 handful of cilantro, chopped 1 10 ounce can of Ro-tel with green chilies, drained 1 taco seasoning packet , you can also use low sodium 1 ranch dip mix packet , you can also use low sodium and MSG free Directions: In a large mixing bowl add sour cream, mayonnaise, half of the taco seasoning and ranch dip packet. Mix well and set aside. In a medium sauté pan, add butter and bag of corn. Sauté until corn is lightly browned and toasted. Add in drained and rinsed black beans, and can of ro-tel. Sprinkle with remianing half of taco seasoning and ranch dip. Mix well and saute for 5-8 minutes. Set aside to cool down. Chop cilantro and scallions, add to sour cream mixture. Add shredded cheese and mix well to combine. Add cool corn mixture to sour cream mixture and mix well. Place in serving dish and chill for at least 2 hours, overnight is best. Serve cold with fresh cut veggies, snack crackers, pretzels or tortilla chips. Notes: Using the low sodium options you will not taste a difference. It's great for those that need to watch their salt intake. If you substitue yogurt for the sour cream, it may run a little thinner. I prefer plain greek yogurt as it's a thicker consistancy. I don't even taste the difference between it from the sour cream. And it's a healthier choice! Store leftovers covered in the refrigerator for up to 5 days. Nutrition: Calories: 56 | Carbohydrates: 1g | Protein: 1g | Fat: 6g | Saturated fat: 3g | Polyunsaturated fat: 1g | Monounsaturated fat: 1g | Cholesterol: 15mg | Sodium: 33mg | Potassium: 41mg | Fiber: 1g | Sugar: 1g | Vitamin c: 1mg | Calcium: 32mg | Iron: 1mg "This dip is complete Yum factor! Creamy-delicious, everyone enjoyed it and asked for the recipe! Makes a really good amount for parties and cookouts." CWT is not a certified dietician or nutritionist. Any nutritional information shared on this site is an estimate counted through measurements and package nutritional information used in each recipe. If calorie, macro counting and other nutritional values are important to you, I recommend running the ingredients through your choice of nutritional calculator you prefer. Calories can vary depending on national brands used per recipe.
- Honey Bun Cake
" Wondering how to make a Honey Bun Cake? You may be surprised to learn that there's actually no honey in the recipe. This cinnamon-roll-like delicious Honey Bun Cake recipe brings a whole lot of flavor with brown sugar, cinnamon and walnuts baked into this super moist cake. It all starts with a mix! Oh and you can't forget the vanilla glaze! 🙂" Honey Bun Cake Servings – 12 Prep Time – 20 Minutes Cook Time – 35 minutes Ingredients: 1 box yellow cake mix 2/3 cup vegetable oil 4 eggs 1 8 ounce container sour cream 3/4 cup packed brown sugar 1/2 cup walnuts, chopped 2 teaspoons ground cinnamon 1 cup powdered sugar 1 tablespoon milk 1 teaspoon vanilla Directions: Heat oven to 350°. Spray bottom and sides of 13x9-inch pan with cooking spray. In large bowl, beat cake mix, oil, eggs and sour cream with electric mixer on medium speed 2 minutes, scraping bowl occasionally. Spread half of the batter in pan. In small bowl, stir together brown sugar, pecans and cinnamon; sprinkle evenly over batter in pan. Carefully pour and spread remaining batter evenly over pecan mixture. Bake 28 to 35 minutes or until golden brown and toothpick inserted in center comes out clean. Remove from oven to cooling rack. In another small bowl, stir powdered sugar, milk and vanilla until thin enough to spread. If powdered sugar mixture is too stiff to spread, add additional milk 1/4 teaspoon at a time. Prick entire surface of warm cake with fork. Carefully pour and spread powdered sugar mixture over warm cake. Cool completely, about 2 hours. Store loosely covered. Notes: When frosting a warm cake, spread in just one direction, using long strokes. Using a back-and-forth motion often causes the top layer of cake to come off, leaving crumbs in the frosting. Brown sugar should alway be measured by packing or firmly pressing into a dry measuring cup. What you’re doing is pressing out any pockets of air that get trapped between the sticky grains of sugar. Nutrition: Calories: 370 | Carbohydrates: 53g | Protein: 4g | Fat: 4g | Saturated fat: 3g | Polyunsaturated fat: 1g | Monounsaturated fat: 1g | Cholesterol: 15mg | Sodium: 270mg | Potassium: 85mg | Fiber: 0g | Sugar: 38g "I have made it several times it's one of those cakes my family and friends always ask for it. Sometimes we have it as aside for breakfast and sometimes for an evening dessert. Deffinately is a great take to work for the coffee bar," CWT is not a certified dietician or nutritionist. Any nutritional information shared on this site is an estimate counted through measurements and package nutritional information used in each recipe. If calorie, macro counting and other nutritional values are important to you, I recommend running the ingredients through your choice of nutritional calculator you prefer. Calories can vary depending on national brands used per recipe.
- Garlic Bread
" Garlic bread is one of the tastiest and easiest sides you can add to any meal. Italian bread is loaded up with garlic, butter, olive oil, cheese, and parsley, baked in the oven, and broiled for the last couple of minutes to ensure an ultra crispy golden top yet soft interior. Serve this with soup, salads, Sunday dinner, or really any meal you can think of and you’re set! " Garlic bread is something I grew up eating. It’s often served complimentary at many Italian restaurants on the East Coast and is definitely a favorite alongside Sunday Gravy with Meatballs and Sausage and really any pasta! Garlic bread is also a great first thing for kids to make because it’s so simple and uses just a few basic ingredients. Garlic Bread Servings – 1 Loaf Prep Time – 5 Minutes Cook Time – 20 Minutes Ingredients: 6 tablespoons unsalted butter 3 tablespoons olive oil 5 cloves garlic, grated 1/4 teaspoon crushed red pepper flakes, optional 1/4 cup flat-leaf Italian parsley, minced 1 loaf of Italian bread 3 tablespoons Pecorino Romano, grated Directions: Preheat oven to 350 degrees and set the first rack in the middle and the other rack to the top 1/3 of the oven. Sauté the garlic in the butter and oil for 2-3 minutes over medium-low heat or until fragrant. Turn off the heat and add in the crushed red pepper flakes and parsley. Split the bread lengthwise and open it up like a book. Brush or pour the garlic butter all over the bread making sure to evenly distribute it. Sprinkle with the Pecorino then cover with foil. Bake for 12 minutes on the lower rack then remove the foil and move the bread to the higher rack. Broil for 1-3 minutes or until the bread is golden around the sides and sizzling but not burnt. Watch the whole time and be prepared to remove it quickly. Once finished, slice the bread and serve. Enjoy! Notes: Any type of bread can be used. Ciabatta, baguette, and all types of crusty bread work well. Shredded mozzarella cheese can be added during the broiling stage. Leftovers can be saved for up to 3 days in the fridge and should be reheated in the oven. Nutrition: Calories: 254kcal | Carbohydrates: 33.1g | Protein: 5.7g | Fat: 11.5g | Saturated Fat: 5.3g | Cholesterol: 20mg | Sodium: 564mg | Potassium: 2mg | Fiber: 1g | Sugar: 1g | Calcium: 20mg | Iron: 2mg " Fabulous! Best garlic bread ever. I Originally being from the East coast, and transplanted to Texas. Guests that I have served this...raved about it. " CWT is not a certified dietician or nutritionist. Any nutritional information shared on this site is an estimate counted through measurements and package nutritional information used in each recipe. If calorie, macro counting and other nutritional values are important to you, I recommend running the ingredients through your choice of nutritional calculator you prefer. Calories can vary depending on national brands used per recipe.
- Patriot Brownies
" These Patriot Brownies are chocolate dipped and then drizzled with red , white and blue . Topped with star sprinkles! This is a super cute dessert for all of your summer events. I don’t know about your family but mine loves brownies in any shape or size . Dipping just about anything in chocolate is always welcomed at my house. I wanted something a little different for the upcoming 4th of July weekend and got inspiration from those famous snack cake chocolate dipped heart shaped brownies for Valentine's Day. These brownies can be enjoyed anytime of year but especially those holidays you want to show a little patriotism like 4th of July or Memorial Day. 🙂" Patriot Brownies Servings – 24 Prep Time – 10 Minutes Cook Time – 30 Minutes Ingredients: 2 boxes Family Sized Duncan Hines Chewy Fudge Brownies 6 eggs 1/2 cup water 1 cup vegetable oil 1 cup semi sweet chocolate chips 1 1/2 cups dark chocolate wafers 1 bag of each Red , white , and blue candy melts you need about 1/3 cup of the wafers Red white and blue star sprinkles Directions: Preheat your oven to 350 degrees. Spray a Jelly Roll pan with cooking spray and line it with parchment paper. A jelly roll pan typically measure about 15.5 x 10.5 In a large mixing bowl add both brownie mixes and eggs . Add both the water and oil, then mix well to commbine. Scrap sides down with a rubber spatula. Fold chocolate chips into the batter. Spread into the prepared pan. Bake in the preheated oven for about 30 minutes. Cool completely. Once the brownies are cooled, melt the dark chocolate wafers in 30 second intervals until the chocolate is melted. Spread chocolate over the top of the brownies. Spread to coat completely. Allow the chocolate to set up. Melt the red , white and blue candy melts in separate bowls . Place the melted wafers in piping bags or ziplock bags. Snip the end off and drizzle the tops of the brownies. Sprinkle with star decorating sprinkles. Notes: Using a star cookie cutter, press into the brownies to cut out even more patriotic shapes. Dip each brownie in the melted dark wafers, set to dry completley. Then contunue to add the red and blue drizzle and star sprinkles. Don't throw away those scraps from the brownie pan. Cut them in tiny bite size pieces and serve them over ice cream sundaes later. Nutrition: Calories: 292 | Carbohydrates: 38g | Protein: 3g | Fat: 15g | Saturated fat: 7g | Polyunsaturated fat: 1g | Monounsaturated fat: 1g | Cholesterol: 61mg | Sodium: 158mg | Potassium: 41mg | Fiber: 1g | Sugar: 31g CWT is not a certified dietician or nutritionist. Any nutritional information shared on this site is an estimate counted through measurements and package nutritional information used in each recipe. If calorie, macro counting and other nutritional values are important to you, I recommend running the ingredients through your choice of nutritional calculator you prefer. Calories can vary depending on national brands used per recipe.
- Ham and Sweet Potato Chowder
Low Sodium - Option " Sweet Potato and Ham Chowder has the perfect blend of deliciously satisfying flavors in one bowl! It’s perfectly hearty and amazingly satisfying. And I’m just wondering why I didn’t think to add sweet potatoes in until now. ! 🙂" I love the way the salty ham in this soup compliments the sweet potatoes. And that it’s loaded with veggies! I love veggies of any kind, and it’s perfectly creamy. This soup has the perfect blend of deliciously satisfying flavors! It's creamy, it's hearty and it's oh so comforting! Perfect for a cold winter day. Ham and Sweet Potato Chowder Servings – 8 Prep Time – 20 Minutes Cook Time – 30-40 minutes Ingredients: 1 1/2 Tbsp olive oil 1 1/4 cups chopped yellow onion 2 cups carrots, peeled and diced 1 1/2 cups celery, diced 3 cloves garlic, minced 3 (15 oz) cans low-sodium or unsalted chicken broth 1 large sweet potato, peeled and diced 1 large russet potato, peeled and diced 2 tsp dried basil 1 tsp dried thyme Salt and freshly ground black pepper 1 stick of butter , diced 1/2 cup all-purpose flour 4 cups whole milk 3 cups diced cooked ham, I use the leftover from a holiday or family Sunday dinner 2 cups frozen corn 1 cup shredded sharp cheddar cheese, plus more for serving if desired 4 Tbsp chopped fresh parsley Directions: Heat olive oil in a large pot over medium-high heat. Add in onions, carrots and celery and sauté 4 minutes. Add in garlic and sauté 1 minute longer. Add in chicken broth, sweet and russet potatoes, basil and thyme and season with salt and pepper to taste, you don't add too much salt as you'll be adding salty ham and cheese later on. Bring mixture to a boil then reduce heat to medium-low and simmer until sweet potatoes and vegetables are tender, about 15 - 20 minutes. Meanwhile, melt butter in a medium saucepan over medium heat. Add in flour and cook, whisking constantly, about 1 minute. Make your Roux: Pour in milk into flour mixture, stir constantly and bring mixture to a light boil, remove from heat. Stir ham and corn into soup (once veggies are tender) and heat through, about 2 minutes. Add in milk mixture to soup. Stir in cheddar and parsley. Serve warm with a loaf of buttered french bread. Notes: Using the low sodium options you will not taste a difference. It's great for those that need to watch their salt intake. If you substitue yogurt for the sour cream, it may run a little thinner. I prefer plain greek yogurt as it's a thicker consistancy. I don't even taste the difference between it from the sour cream. And it's a healthier choice! Store leftovers covered in the refrigerator for up to 5 days. Nutrition: Calories: 593 | Carbohydrates: 52g | Protein: 1g | Fat: 33g | Saturated fat: 15g | Cholesterol: 83mg | Sodium: 769mg | Potassium: 116mg | Fiber: 6g | Sugar: 15g | Vitamin c: 52.1mg | Calcium: 321mg | Iron: 2.8mg "This dip is complete Yum factor! Creamy-delicious, everyone enjoyed it and asked for the recipe! Makes a really good amount for parties and cookouts." CWT is not a certified dietician or nutritionist. Any nutritional information shared on this site is an estimate counted through measurements and package nutritional information used in each recipe. If calorie, macro counting and other nutritional values are important to you, I recommend running the ingredients through your choice of nutritional calculator you prefer. Calories can vary depending on national brands used per recipe.
- Tortellini Antipasto Kabobs
" Traditional tortellini salad becomes a finger food with these Tortellini Antipasto Kabobs. They are a fresh and flavorful, appetizer, perfect for everything from cocktail hours to pool parties! " These Cold Tortellini Skewers add a little something extra special to any event you bring them to. They say that foods on a stick are just a bit tastier and who I am to disagree? Cold pasta salad gets an upgrade with these kabobs. Cheese tortellini combines with cheese, salami, olives and tomatoes. No forks needed! Tortellini Antipasto Kabobs Servings – 4 to 6 Prep Time – 10 Minutes Cook Time – 15 Minutes Ingredients: 1 6oz jar Castelvetrano olives, Mezzetta brand is best! 1 10oz jar of Italian Kalamata olives, pitted 1lb fresh mini mozzarella pearls, found in your local deli or supermarket 1lb fresh cherry or grape tomatoes, sliced in half the short length 1lb fresh Genoa salami 12 oz package tortellini pasta, filled with your choice of filling - I use Barilla cheese and spinach stuffed, they are my favorite! 1 4 oz package of fresh basil leaves balsamic vinaigrette, for garnish drizzle 1 small jar of pesto sauce or my homemade pesto 8-10 wooden kabob skewers Directions: Boil a large pot of water over medium to high heat; adding the salt when it comes to a full rolling boil. Cook tortellini “al dente” according to package directions. Drain and rinse with cold water to stop the cooking process. Place half of the cooked tortellini in a large bowl. Add half of the mini mozzarella pearls and gently toss with the pesto mixture to coat. Fold each salami circle slice in fours. I promise they stay together once you thread them onto the skewers. Thread the tortellini, tomatoes, olives (alternating between green and black), salami slices, fresh basil leaves and mozzarella pearls onto skewers. Alternate each item; two pieces of tortellini (one plain, and one pesto coated), two mozzarella pearls (one plain, and one pesto coated), two different colored olives, two tomato halves, and two salami slices (folded) with one basil leaf on each skewer. Cover with plastic wrap and refrigerate until ready to serve. Variations: The possibilities are endless, so if you want to make these a bit more colorful, feel free to add other raw veggies. Make sure they are delicious and easy to eat raw and also thread well. These are my favorites: Cucumber slices Bell Pepper Red Onion Marinated Mushrooms Marinated artichoke hearts You can also add a different type of meat if you wish. But since these aren’t cooked (well, the pasta is…) I would suggest using thick or folded pepperoni slices. You can ribbon up some prosciutto or even use cooked chunks of pesto marinated grilled chicken or Italian sausage chunks . Nutrition Calories: 57 | Carbohydrates: 4g | Protein: 3g | Fat: 4g | Saturated Fat: 1g | Polyunsaturated Fat: 1g | Monounsaturated Fat: 1 g | Cholesterol: 5mg | Sodium: 149mg | Potassium: 38mg | Fiber: 1g | Sugar: 1g | Vitamin A: 215 IU | Vitamin C: 2mg | Calcium: 44mg | Iron: 1 mg "This recipe is great for backyard BBQ's, baby showers, kids parties or even for an evening you don't feel like cooking!" CWT is not a certified dietician or nutritionist. Any nutritional information shared on this site is an estimate counted through measurements and package nutritional information used in each recipe. If calorie, macro counting and other nutritional values are important to you, I recommend running the ingredients through your choice of nutritional calculator you prefer. Calories can vary depending on national brands used per recipe.
- Fried Mozzarella Sticks
"Mozzarella sticks are very easy to make at home. They're deep-fried until golden and crispy on the outside, with melted gooey cheese on the inside. They're so good and take just minutes to fry! Try dipping them in a marinara sauce!” Fried Mozzarella Sticks Servings – 8 Prep Time – 15 Minutes Cook Time – 10 Minutes Ingredients: 2 large eggs, beaten 1/4 cup water 1 1/2 cups Italian seasoned bread crumbs 1/2 teaspoon garlic powder 2/3 cup all-purpose flour 1/3 cup cornstarch 2 cups oil for frying, or as needed 1 (16 ounce) package mozzarella cheese sticks, freeze for 2 hours before cooking to prevent cheese leakage when frying. Directions: Whisk water and eggs together in a small bowl. In a separate bow mix bread crumbs and garlic powdee together. Blend flour and cornstarch together in a third bowl. Heat oil to 365 degrees in a large, heavy saucepan. Dredge a mozzarella stick in flour; shake off excess. Dip into egg mixture. Lift up so excess egg drips back in the bowl. Press into bread crumbs to coat. Repeat this step one more time to double coat for a crunchy coating. Place breaded mozzarella stick on a plate or wire rack. Repeat with remaining mozzarella sticks. Use a spider spoon or a pair of tongs to lower 3 to 4 mozzarella sticks into the hot oil. Fry until golden brown, about 30 seconds. Remove from heat and drain on paper towels. Repeat to fry remaining mozzarella sticks. Serve hot with a side of warm marinara sauce! Notes: Substitute one coating or both of the Italian bread crumbs for panko bread crumbs. This will have a crispier texture. After dredging process freeze breaded Mozzerella sticks for 2 hours before frying. This will help with cheese leakage from the breading while frying. Nutrition: Calories 789 | Fat 67g | Saturated Fat 13g | Cholesterol 83mg | Sodium 806mg | Carbohydrate 30g | Fiber 1g | Protein 19g | Calcium 483mg | Iron 2mg | Potassium 76mg "This recipe is a keeper. I make a huge batch along with my chicken wings for Super Bowl parties, game days, or for any party!” CWT is not a certified dietician or nutritionist. Any nutritional information shared on this site is an estimate counted through measurements and package nutritional information used in each recipe. If calorie, macro counting and other nutritional values are important to you, I recommend running the ingredients through your choice of nutritional calculator you prefer. Calories can vary depending on national brands used per recipe.
- Bahama Mama Cocktail
" A Bahama Mama cocktail is a delicious tropical-flavored rum cocktail that's perfect for summer!” Bahama Mama Cocktail Servings – 2 Prep Time – 5 Minutes Ingredients: 2 cups ice 2oz orange juice 2oz pineapple juice 1oz rum 1oz coconut-flavored rum 1oz grenadine syrup Directions: Combine orange juice, pineapple juice, regular rum, coconut-flavored rum, and grenadine in a shaker or blender for one minute. Add ice to two glasses and pour mixture over top of ice. Garnish glasses with pineapple chunks, oranges and maraschino cherries. "Delicious, fruity and refreshing cocktail for any summer time BBQ, cookout or night in!” CWT is not a certified dietician or nutritionist. Any nutritional information shared on this site is an estimate counted through measurements and package nutritional information used in each recipe. If calorie, macro counting and other nutritional values are important to you, I recommend running the ingredients through your choice of nutritional calculator you prefer. Calories can vary depending on national brands used per recipe.
- Peanut Butter Sandwich Cookies with Milk Shooters
" Peanut Butter Sandwich Cookies with Nutella Filling. Add the sprinkles to the filling - and you have festive cookies perfect for Birthdays, holidays, after school surprise or any special occasion! " For these peanut butter cookies I played with my food! I took a few recipes and rolled them into one. I started out with a classic peanut butter cookie recipe, but they were way too crispy and thin for this particualr accomplishment. So I increased the flour and added some cornstarch to up the chewy factor and reduce the spreading like the other recipes. The resulting cookie you have here keeping the awesome peanut buttery flavor of the classic PB cookie, but is a touch more chewy. And perfect for Nutella smooshing and covering in sprinkles! Peanut Butter Sandwich Cookies with Milk Shooters Servings – 12 Prep Time – 2 Hours and 10 Minutes, this includes chill time Cook Time – 7 to 9 Minutes Ingredients: 1- 13oz jar of Nutella 1/2 cup butter 1/2 cup peanut butter (crunchy or creamy), at room temperature 1/2 cup granulated sugar 1/2 cup packed brown sugar 1 egg 1/2 teaspoon vanilla 1 1/2 cups all purpose flour 1 teaspoon cornstarch 1/2 teaspoon baking powder 1/2 teaspoon baking soda granulated sugar for rolling, optional colored sprinkles of your choice Directions: In a large bowl, beat butter and peanut butter until well combined. Add sugar and beat until light and fluffy. Mix in egg and vanilla. In a separate small bowl, combine flour, cornstarch, baking powder and baking soda. Mix dry and wet ingredients together. Adding the dry a little at a time to the wet. Scrape down sides of bowl, cover with plastic wrap, and refrigerate for at least 2 hours. Pre-heat oven to 375 F. Line cookie sheets with silicone baking mats or parchment paper. Roll dough into 1 tbsp sized balls, roll in the optional granulated sugar to coat. Place on baking mat and press down slightly with a fork, across in one direction and then again in the opposite direction. Making the criss cross markings. Bake for 7-9 minutes until bottoms are golden brown. Cookies will look under-baked when removed from the oven but will set up on baking sheet. Cool for 5 minutes, transfer to a wire rack to cool completely. Once cooled, size up your cookies. A top to a matching bottom. Sometimes one can be slightly smaller than the other, so you just want to make sure they are close in size. On a small plate pour our your colored sprinkles. Set aside while you assemble the sandwiches. Spread or squeeze about a tablespoon or so of Nutella on the flat side of one cookie, then sandwich it together with another and smoosh them together lightly. Roll the edge of your sandwich through the sprinkles so they adhere to the exposed Nutella between the cookies. Repeat for all of the cookies. Store cookies in an airtight container on the counter for 3 days, or in the fridge for about a week. Milk Shooters You can use any side cup you would like. I used little mini glasses I had on hand. To rim your glasses you’ll need a tablespoon of Nutella, and roll the lip edge of your glass until you make a complete circle around the rim. Roll the Nutella coated rim on the plate of sprinkles, the same way you would rim a margarita or bloody mary glass. You can pop them into the freezer for 5-10 minute so the chocolate can harden up, this is optional. I did it at the time, because it was about 102 degrees out! Notes: I tested this recipe with both creamy and crunchy peanut butter; both worked so it's your preference. Chill your dough for at least 2 hours , chilling is an essential step for this recipe to reduce spreading. Cookies will look under-baked but will set up on the cookie sheet while cooling. Assemble cookie sandwiches just prior to eating. To avoid the centers from getting soggy. No one wants a soggy sad cookie. Don't exceed 1 tbsp-sized balls, this will help you keep them all the same size during your cookie size up. Remove from the oven when bottoms are golden brown, not sides {when the sides were brown for me, the cookies were too crispy}. They will look puffy and under-baked but they firm up while cooling on the cookie sheet. "I made these for an afterschool treat when the kids were having friends over. They were a hit and the milk shooters shot the laughter through the rooftop!" CWT is not a certified dietician or nutritionist. Any nutritional information shared on this site is an estimate counted through measurements and package nutritional information used in each recipe. If calorie, macro counting and other nutritional values are important to you, I recommend running the ingredients through your choice of nutritional calculator you prefer. Calories can vary depending on national brands used per recipe.
- No Bake Cheesecake
" The combination of a buttery graham cracker crust, creamy filling, and fruit topping creates a delicious balance of flavors and textures that make this easy No Bake Cherry Cheesecake a true crowd-pleaser! " In my opinion, it’s not necessarily better or worse than your Classic NY Cheesecake, it’ different. If you’re going for the easiest cheesecake recipe, no bake is where it’s at! It doesn’t take much time at all to whip up and is super delicious. A traditional cheesecake is more dense and richer in flavor. No Bake Cheesecake Servings – 8 Prep Time – 10 Minutes Chill Time – 4 hours for best firm results Ingredients: 1 pre-made graham cracker pie crust 1-8 ounce block cream cheese, softened 1 teaspoon vanilla exctract, optional 1/3 cup powdered sugar, or granulated if you don't have powdered 1-8 ounce tub whipped topping, thawed 1-21 ounce can cherry pie filling or your favorite flavor, or fresh fruit sliced Directions: In a large mixing bowl, mix the softened cream cheese, vanilla and powdered sugar until smooth. Add the whipped topping and mix until well combined. Spoon into the graham cracker crust and spread to an even layer. Spoon the cherry pie filling on top and refrigerate for at least 2 hours or until ready to serve. Notes: Quick make your own graham cracker crust recipe: You can make a homemade crust if you want to. Add 9 graham cracker sheets in a food processor and pulverize until they’re fine crumbs. It’ll make about 1 1/3 cups of graham cracker crumbs. Add 1/3 cup of sugar, 6 tablespoons melted butter and 1/4 teaspoon of ground cinnamon and mix until well-combined. Press the graham cracker mixture into the bottom of a 9-inch pie plate and set aside. Do I need to use a Springform Pan for this recipe? Nope! Using a regular pie plate works perfect. A square baking dish or a tart pan would work too! But... Even easier if you buy a premade pie crust. You could even make these into 12 mini cheesecakes! How to Store Leftover Cheesecake: Cover the no bake cherry cheesecake dish with plastic wrap or store in an airtight container and refrigerate. This dessert will last in the fridge for up to 5 days. What size pan should I use if I double the recipe? If you double the recipe, it’ll fit great in a 9 by 13-inch pan. Can I use other pie fillings or flavored crusts? Absolutely! One thing I love about this no bake cheesecake recipe is that it is so versatile. Top with fresh fruits you love or other fruit pie fillings; blueberry, raspberry, strawberry, pineapple, cinnamon apple, peach or mix it up and do an Oreo crust with cherries on top for a Black Forest no bake cheesecake! "This was the first cheesecake I had ever made in my Home Economics class way back when... But this was the base of my cooking hobby taking off. Since the 90's I have made over 350 of these cheese cakes. My favorite was when I had to set an assembly line to make these for an elderly residents home Valentine's dinner dance we were planning as a group of teenagers. One memory and experience I will never forget." CWT is not a certified dietician or nutritionist. Any nutritional information shared on this site is an estimate counted through measurements and package nutritional information used in each recipe. If calorie, macro counting and other nutritional values are important to you, I recommend running the ingredients through your choice of nutritional calculator you prefer. Calories can vary depending on national brands used per recipe.